Customers Creation Process Guide
This guide provides a comprehensive step-by-step walkthrough for creating a new customer profile within the system. Whether you're registering an individual or a company, this process ensures all essential information is accurately captured and submitted.
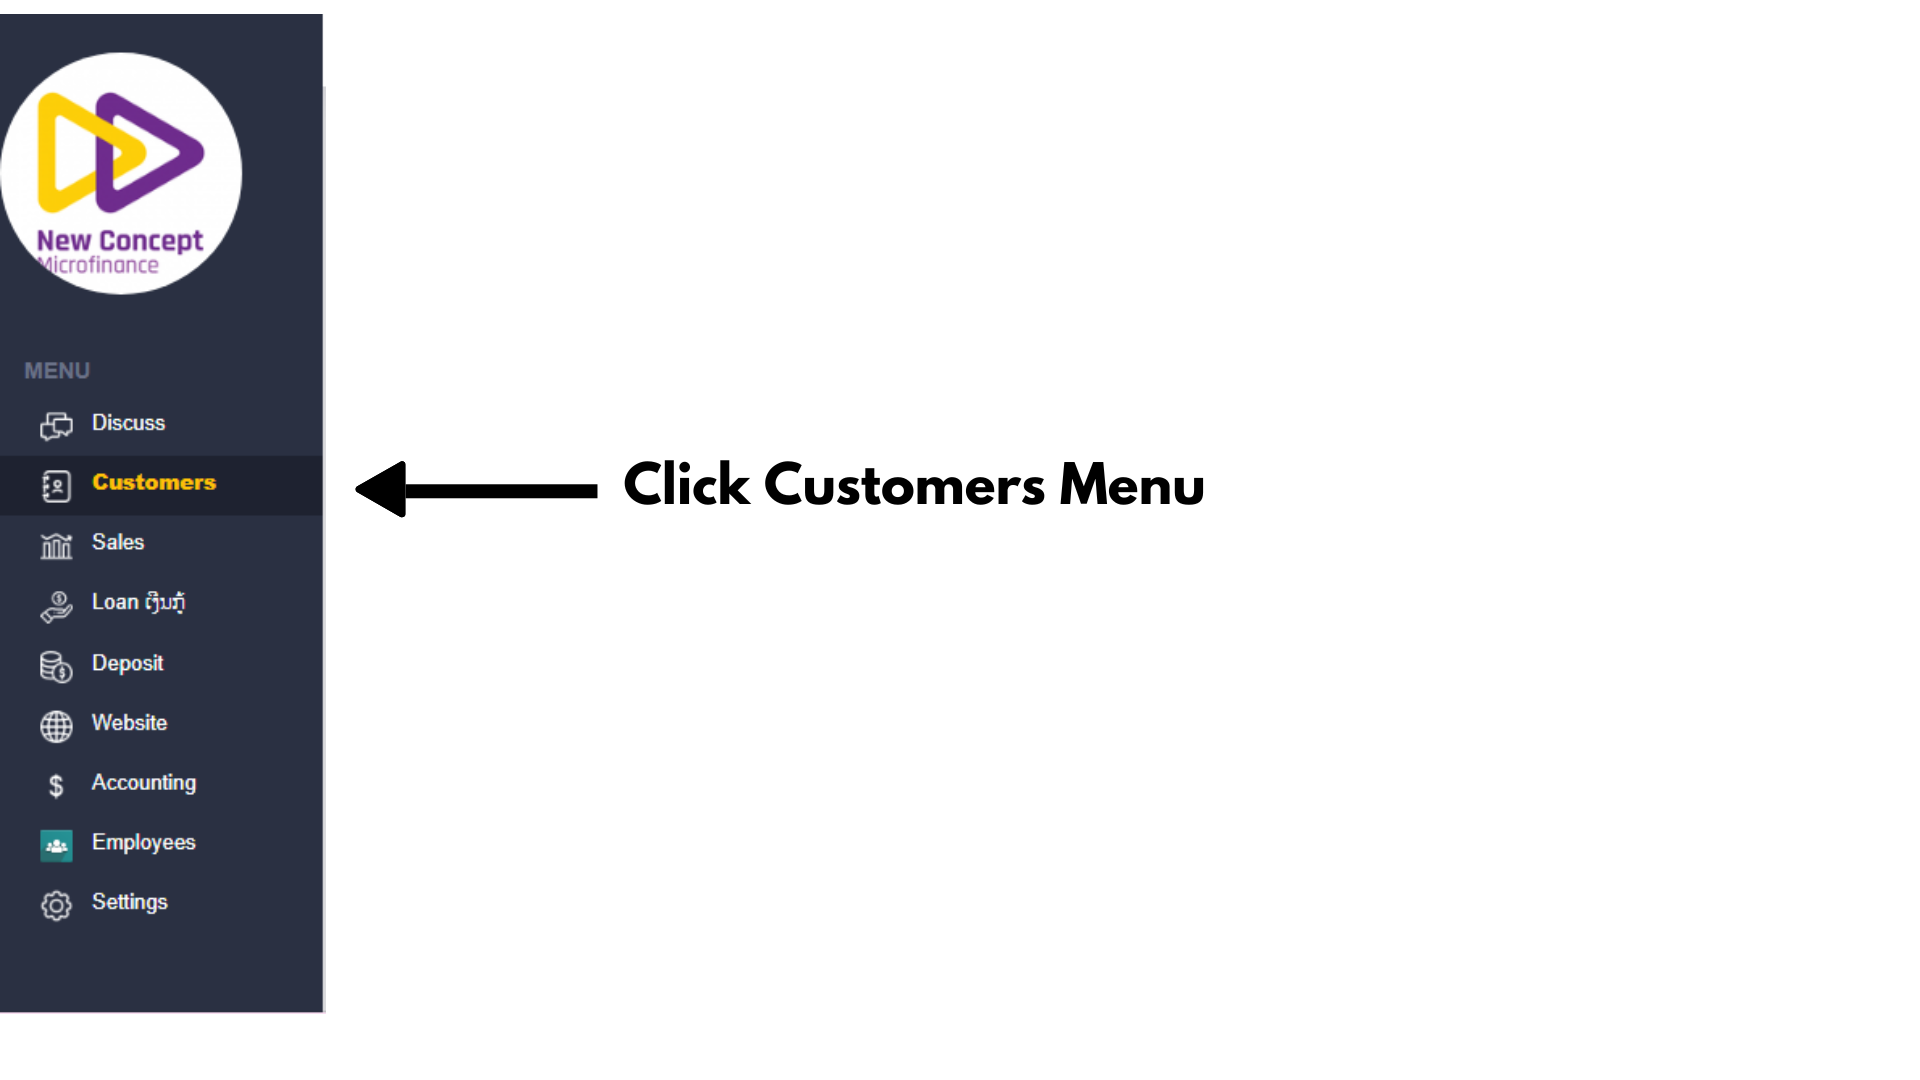
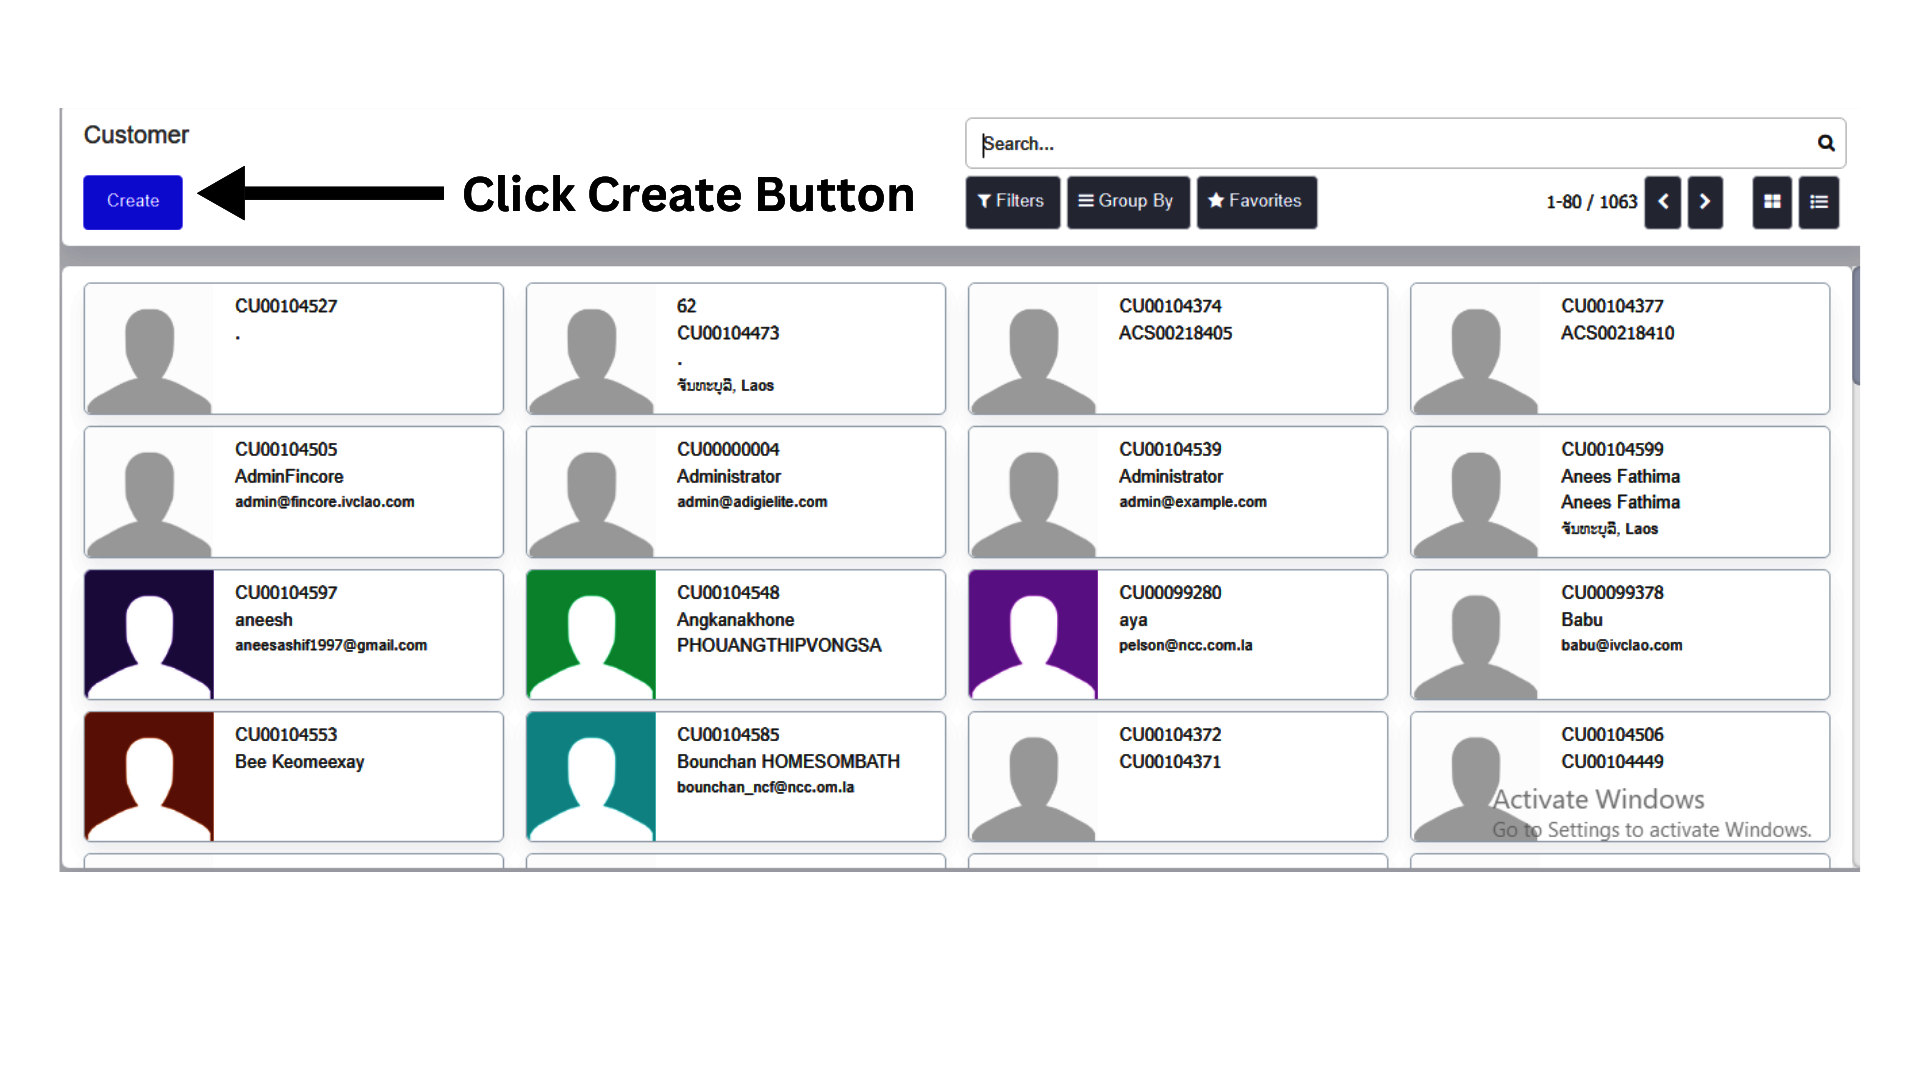
Accessing the Customer Create Page
To begin:
- Navigate to the Customers menu.
- Click the "Create" button to initiate a new customer registration
Filling Out Customer Information
Uploading a Profile Photo
- Click the “Add Profile” button.
- Select a photo from your device or capture one using your camera.
- Once selected, the image will be displayed and saved as the customer’s profile picture.
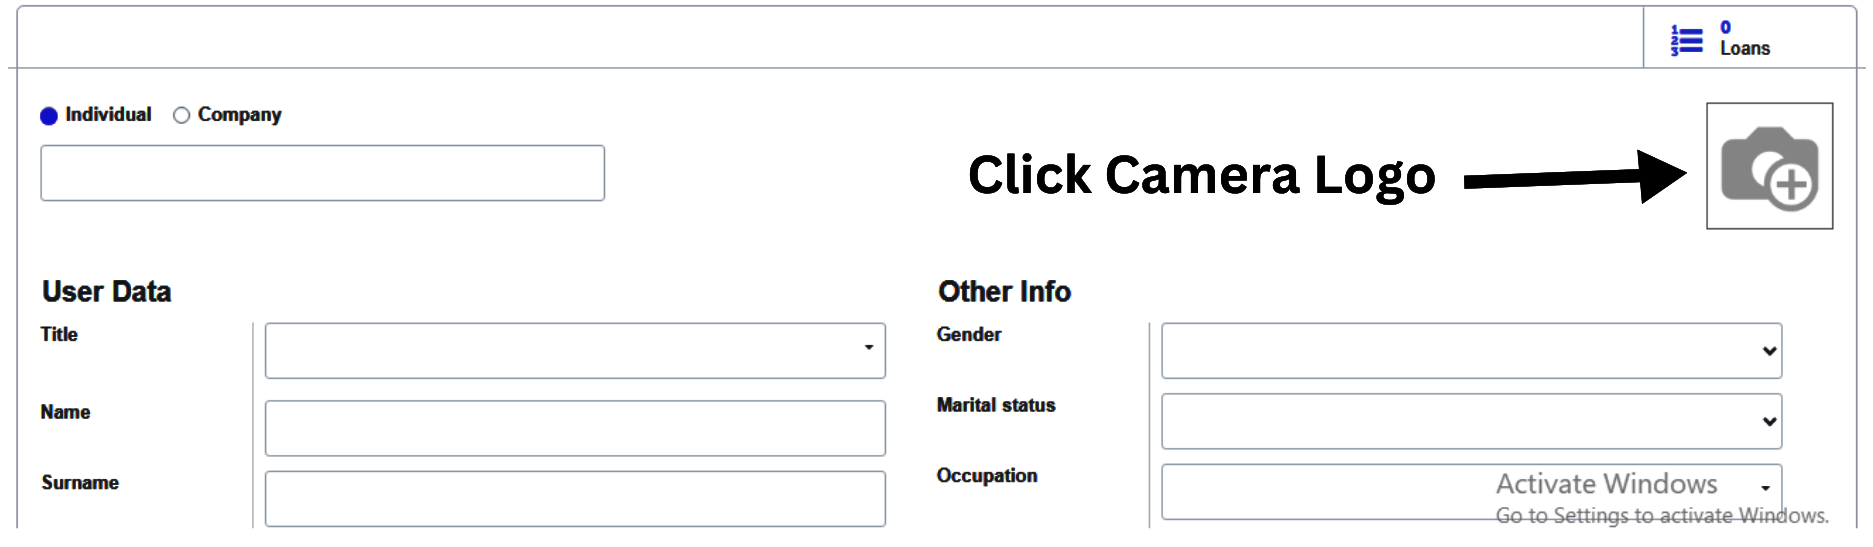
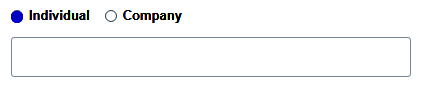
Click "Individual" Option:
- If you select this option, you would likely enter your name (personal name) in a text field.
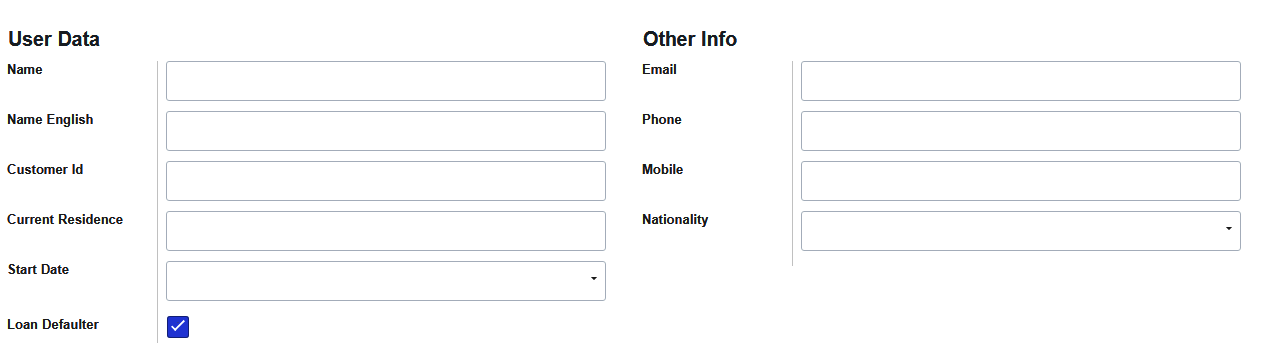
Individual Option Classification
- Title : Select your Title type from the dropdown menu
- Name, Surname : Type Name and Surname in your local Language.
- Name English, Surname English : Type your Name and Surname in English Language.
- Customer Id : The user enters their information (e.g., name, email, phone number) into the form. When the form is submitted, the backend system automatically creates a unique customer ID . The customer data is saved in the database along with the newly created customer ID.
- Current Residence : Type your Current Residence.
- Gender : Select your Gender from the dropdown menu
- Marital Status : Select your Marital Status from the dropdown menu
- Occupation : Select your Occupation from the dropdown menu
- Type Your Email, Phone or Mobile Number, Date of Birth, age in the box.
- Nationality : Select your Nationality from the dropdown menu
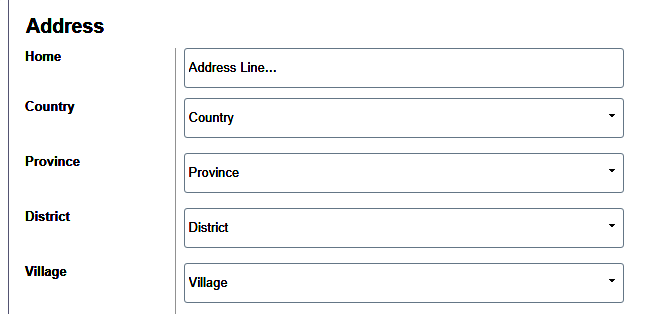
- Address : Fill Your Address in the dropdown menu.
Click "Company" Option:
If you select this option, it switches the input field so you can enter the company name instead of an individual name.
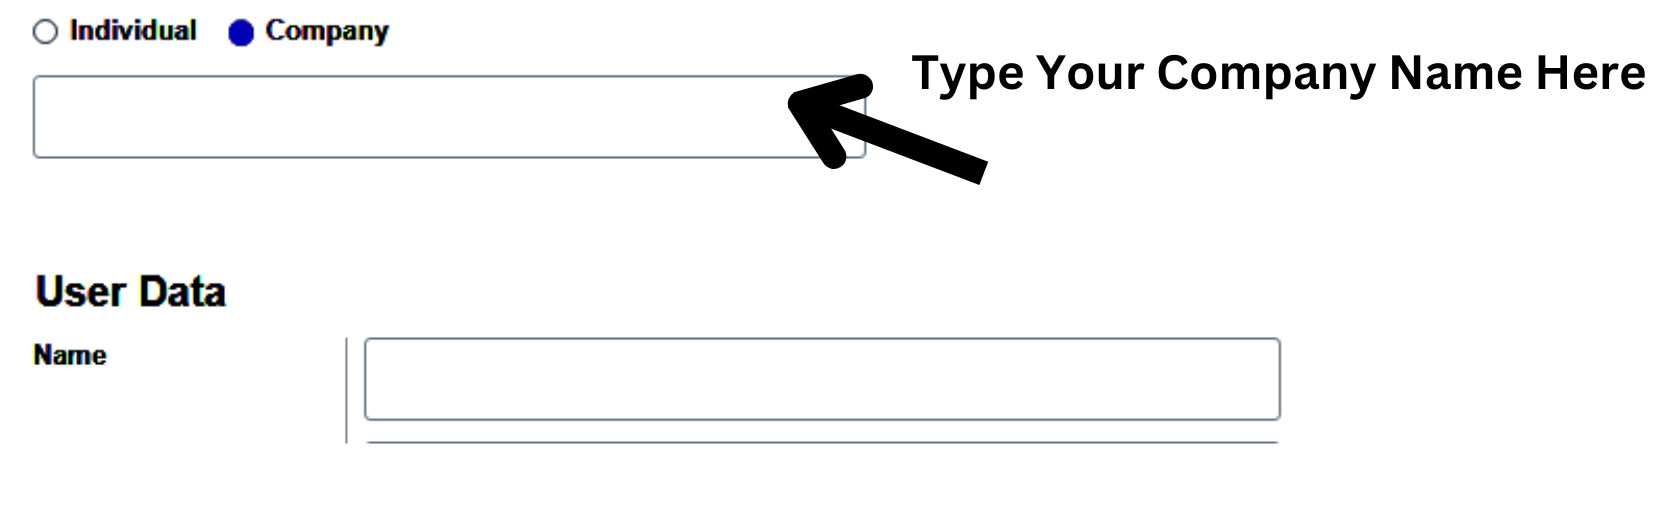
Company Option Classification
- Name : Type Name in your local Language.
- Name English: Type your Name in English Language.
- Customer Id : The user enters their information (e.g., name, email, phone number) into the form. When the form is submitted, the backend system automatically creates a unique customer ID . The customer data is saved in the database along with the newly created customer ID.
- Current Residence : Type your Current Residence.
- Start Date : Select Your Company Start Date in the Dropdown menu.
- Type Your Email, Phone Number in the box.
- Nationality : Select your Nationality from the dropdown menu
- Address : Fill Your Address in the dropdown menu.
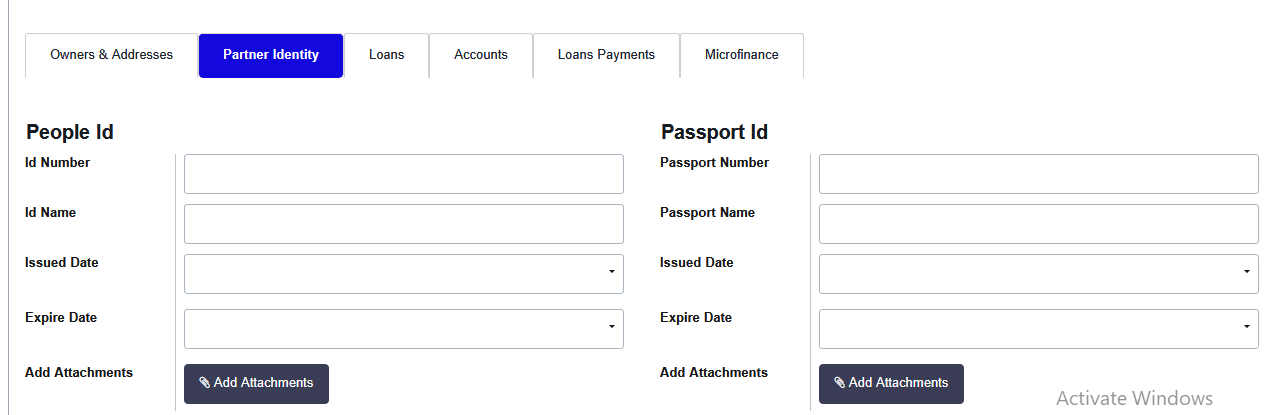
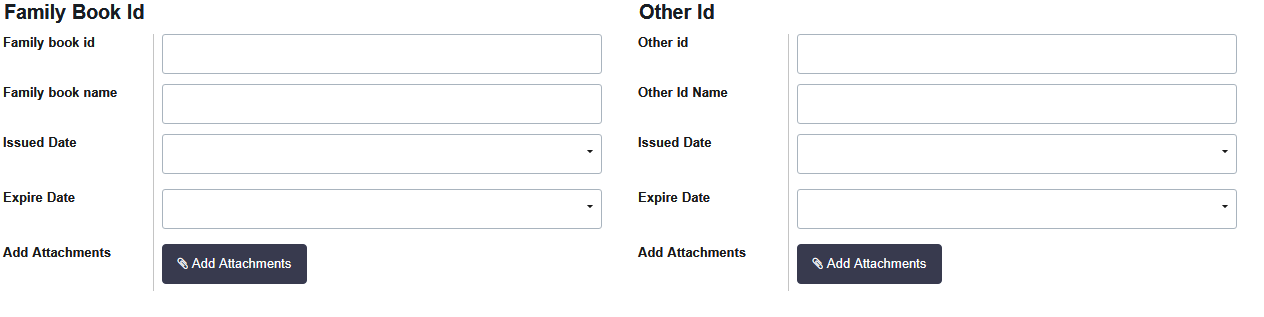
Partner Identity
ID Types: There are four different ID options available for the customer to choose from. The customer can select one or many of these ID types, depending on their preference or situation. While the customer can choose to provide one or two forms of ID, at least one ID is mandatory for the process to proceed.
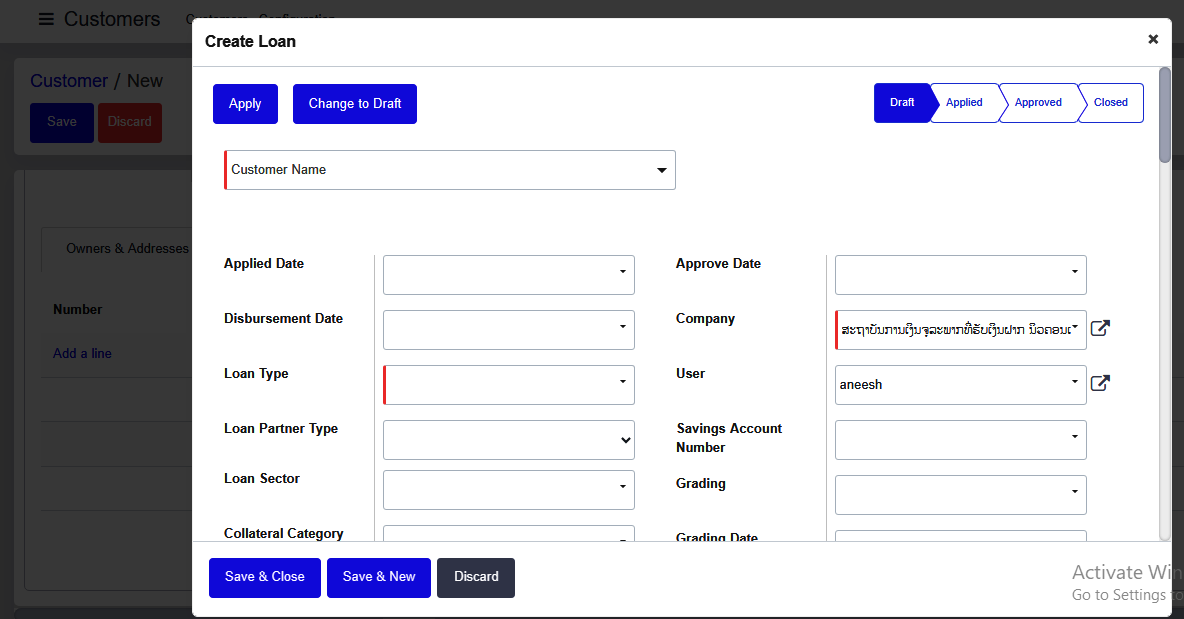
Loan Information
- Once a loan is created, its details will appear in the Loans menu.
- A customer could not apply for the loan. Click "Add a Line" to apply for the loan.
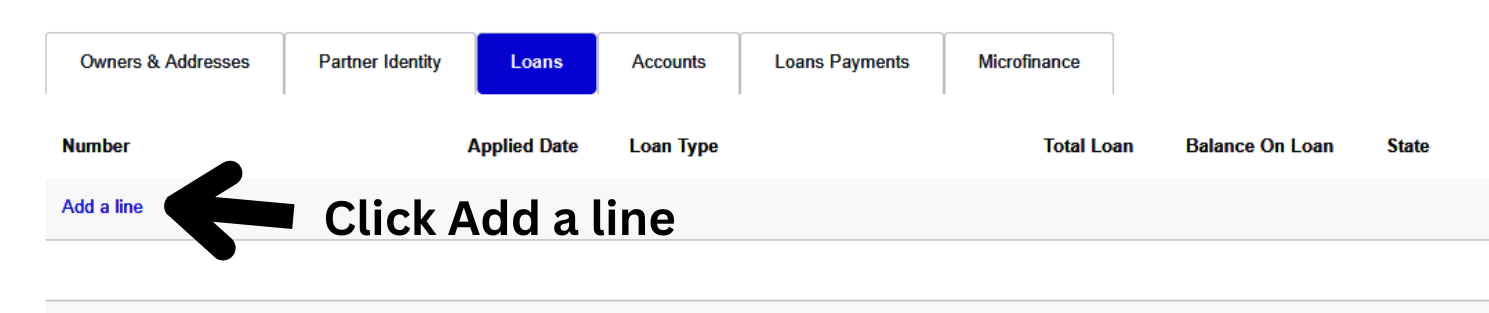
The customer did not apply for the loan using this form. To apply the loan process.

After the customer completes the loan process, the loan details will be visible in the Loans menu.
Accounts Informations
- The customer did not open any Account (Savings account, Joint account, Deposite account etc..) using this form.
- To apply the Account Opening process.
- Click "Add a line"..

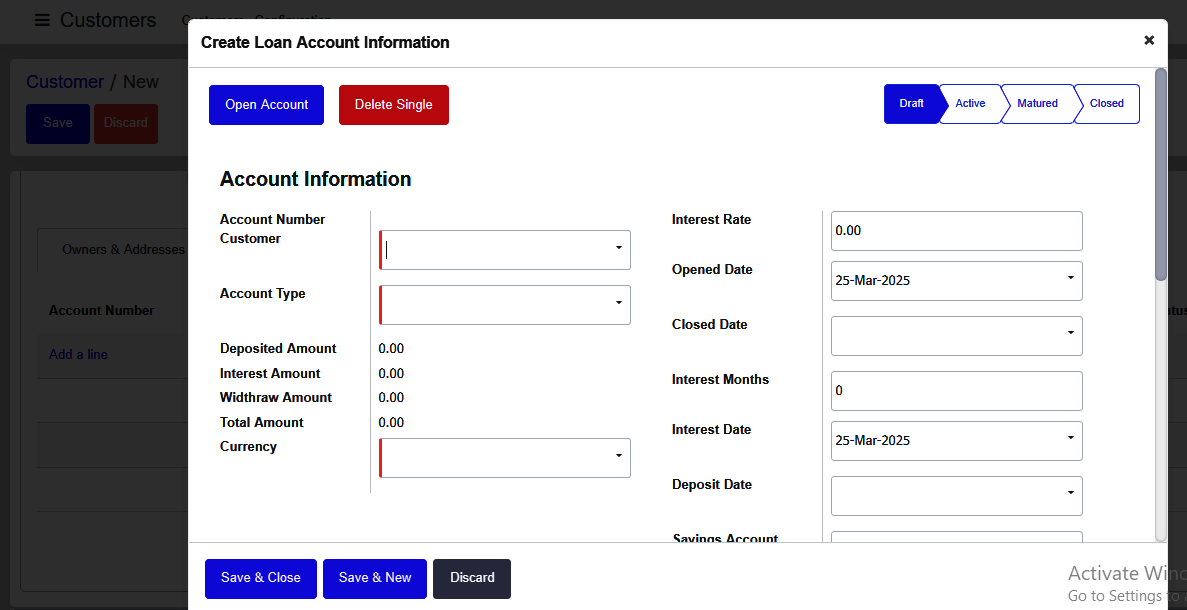

- After the customer completes the Account Opening process, the Account details will be visible in the Accounts menu.
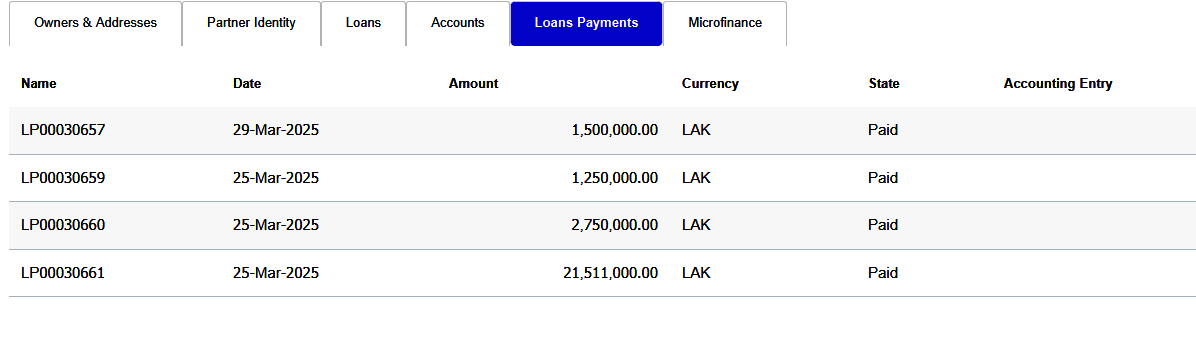
Loan Payment Details
- The customer can check loan payment details using the Loan Payment menu.
- Loan payment history and status (Paid/Unpaid) can be tracked under the Loan Payments menu.
- Additional payment information is also viewable here.
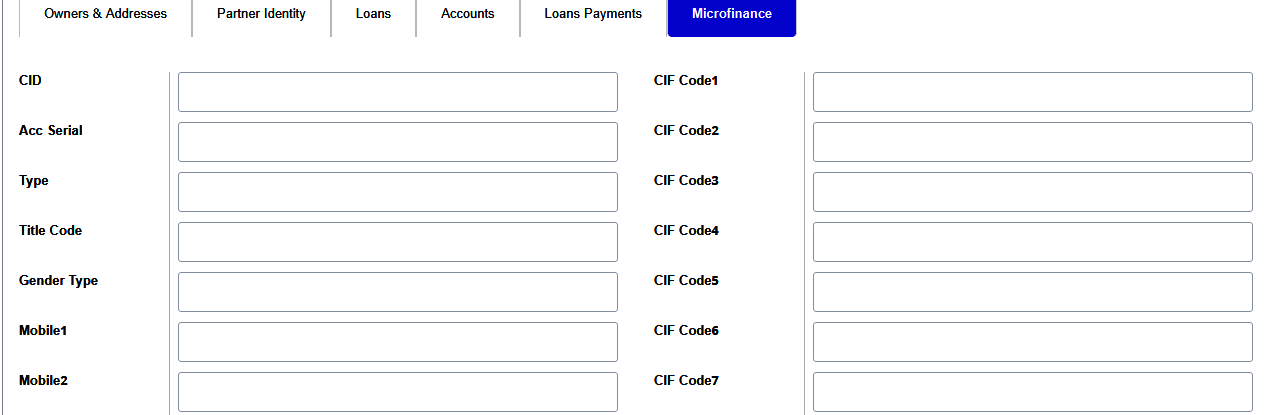
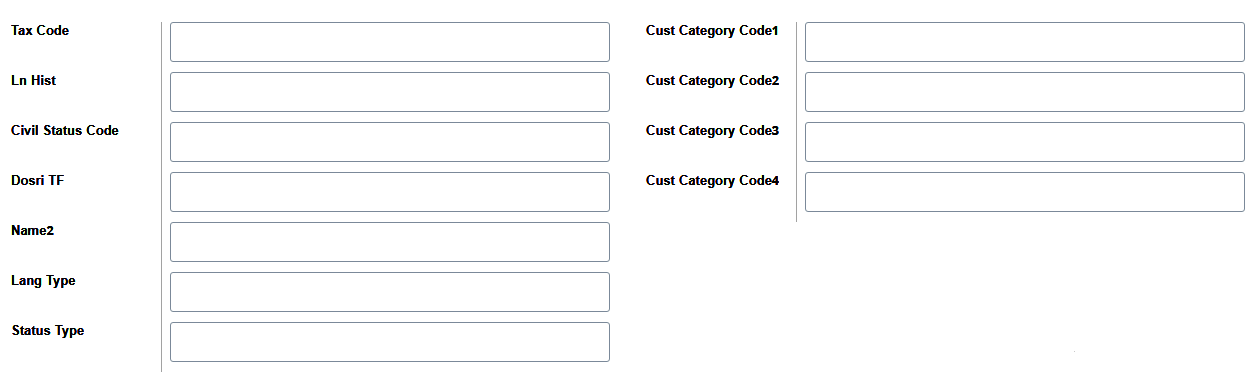
Microfinance Registration (Existing Customers)
- Use the Microfinance option and enter the Customer ID (CID) along with other required details
- If a new microfinance wants to add an existing customer to this app, they can use the Microfinance option to enter the CID and other details to register the old customer in the system.
Additional Communication Tools
Send Message :
- customers form at the bottom view of this feature. The "Send Message" menu is used to send messages
- Communicate with users by sending messages, including attachments such as files and images.

Log Note
- The ”Log Note” feature is used for internal communication and record-keeping within different modules like Sales, Loans, Projects, and Accounting.

Page View Options
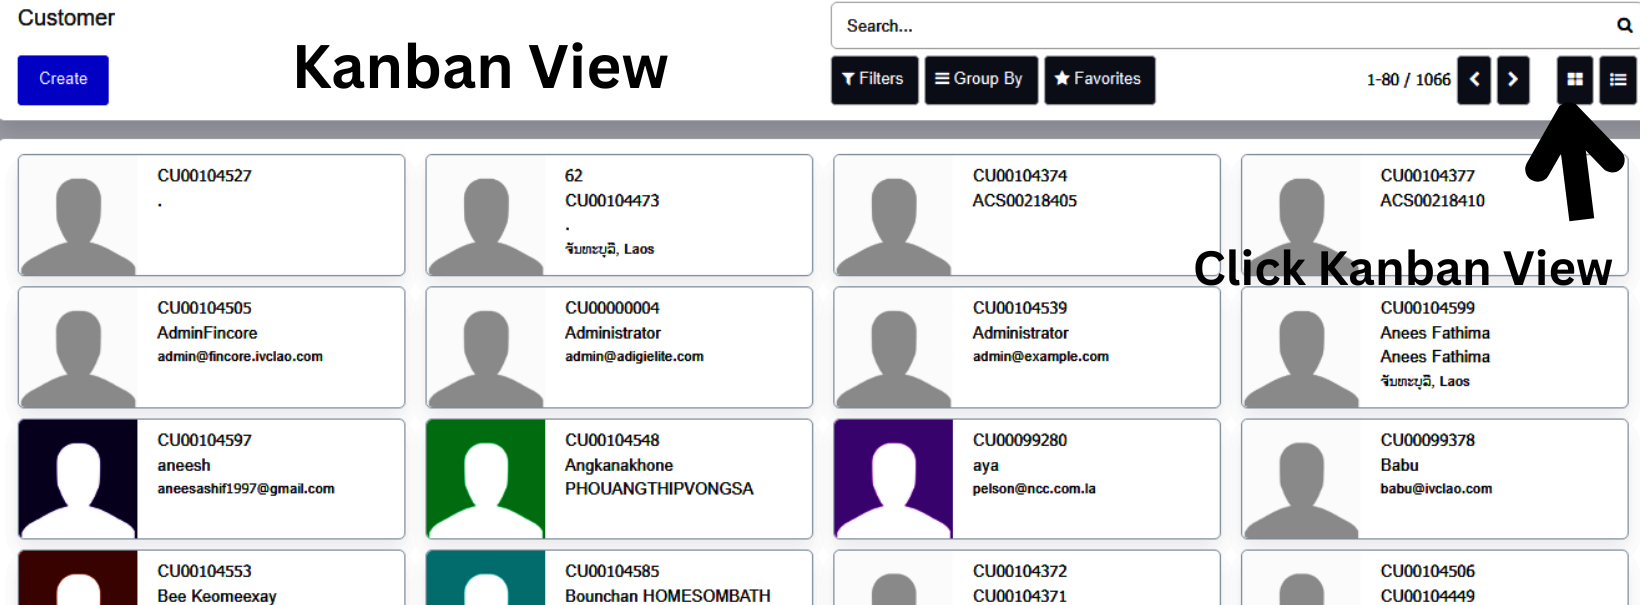
Kanban View:
- The Kanban View is a visual representation of records, displayed as cards organized into columns.
- It is widely used for task and workflow management across various modules.
- Shows key details like customer names, deadlines, and assigned users without opening the record.
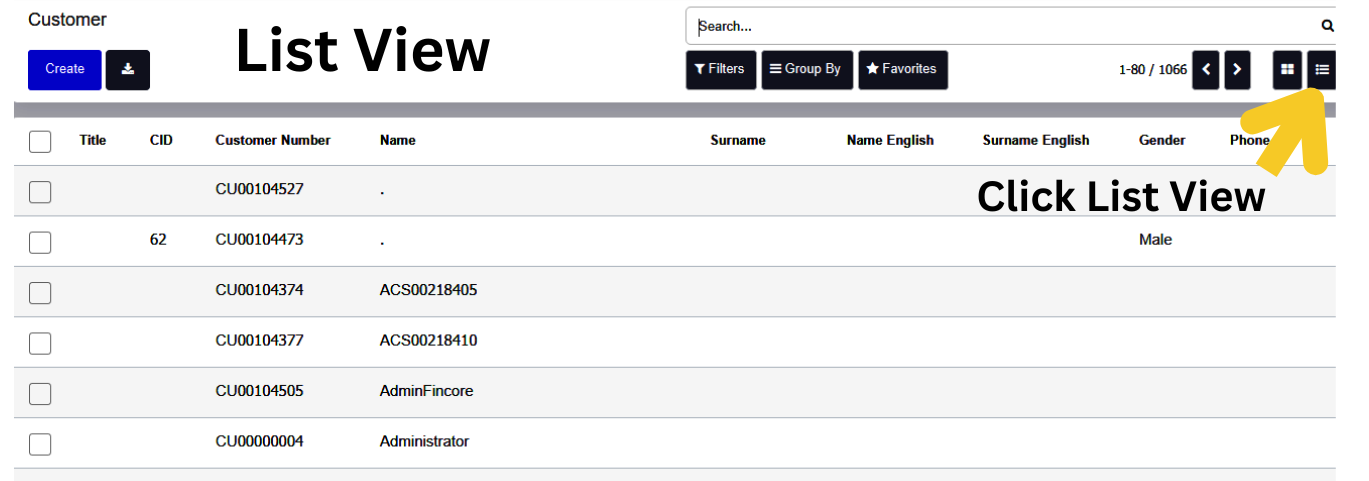
List View:
- The List View displays records in a tabular format, making it easier to manage and analyze large amounts of data. Presents records in a clear, organized table format. Allows users to see multiple entries on a single screen.