Account Creation Process Guide
This guide provides step-by-step instructions for applying for an account that supports deposits and withdrawals within the system.
Prerequisites
- Before you can open an account, you must have a Customer ID. If you do not already have one, the system will prompt you to create it during the application process.
Application Process: Deposit Menu
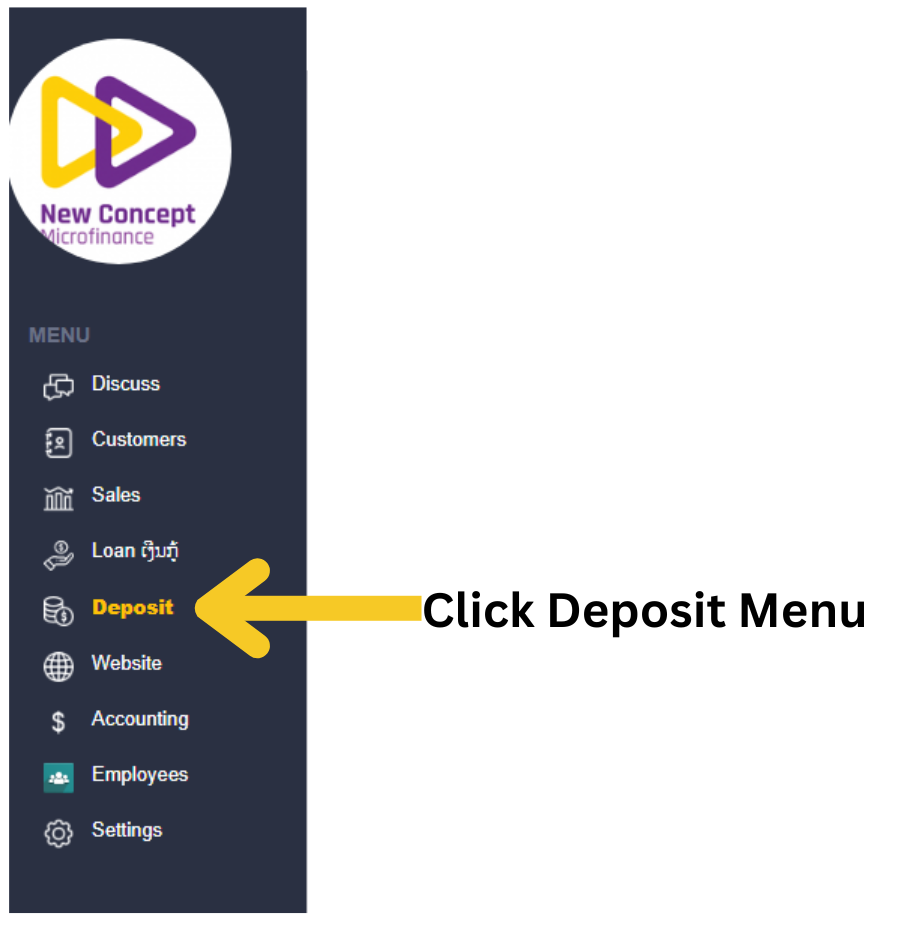
Access the Deposit Menu
- Navigate to the Deposit Menu from the main interface.
- Click the “Create” button to start a new manual account application.
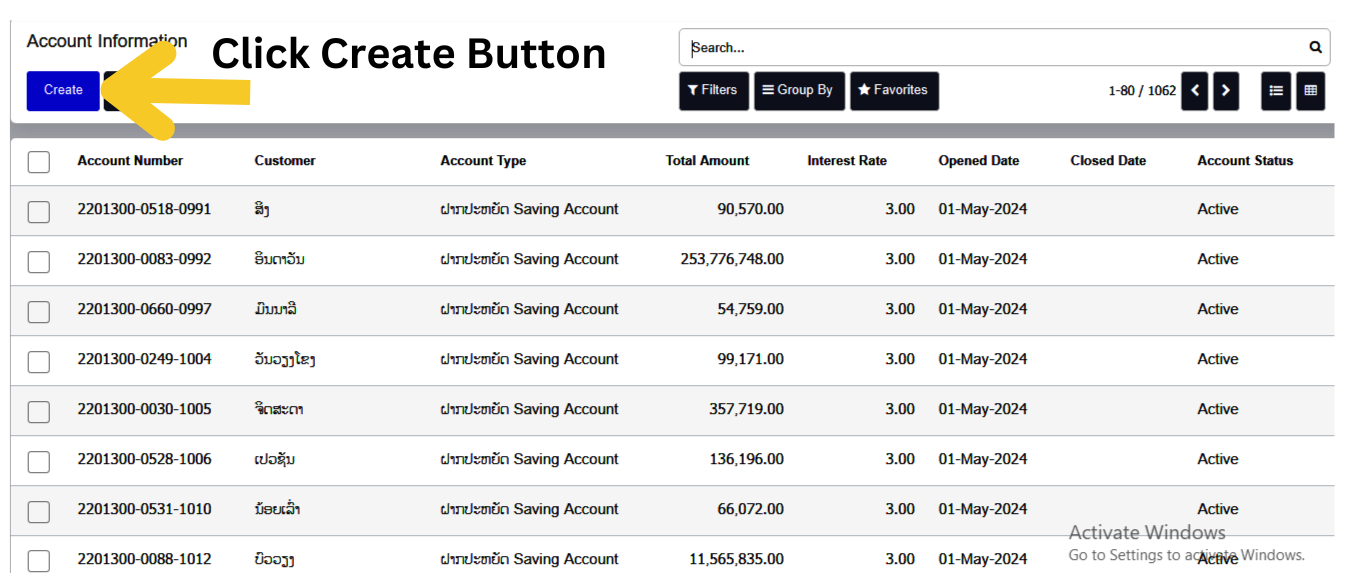
Account Information
- Account types are used to classify financial accounts for proper accounting, management, and reporting. You will be asked to select the appropriate account type based on your needs.
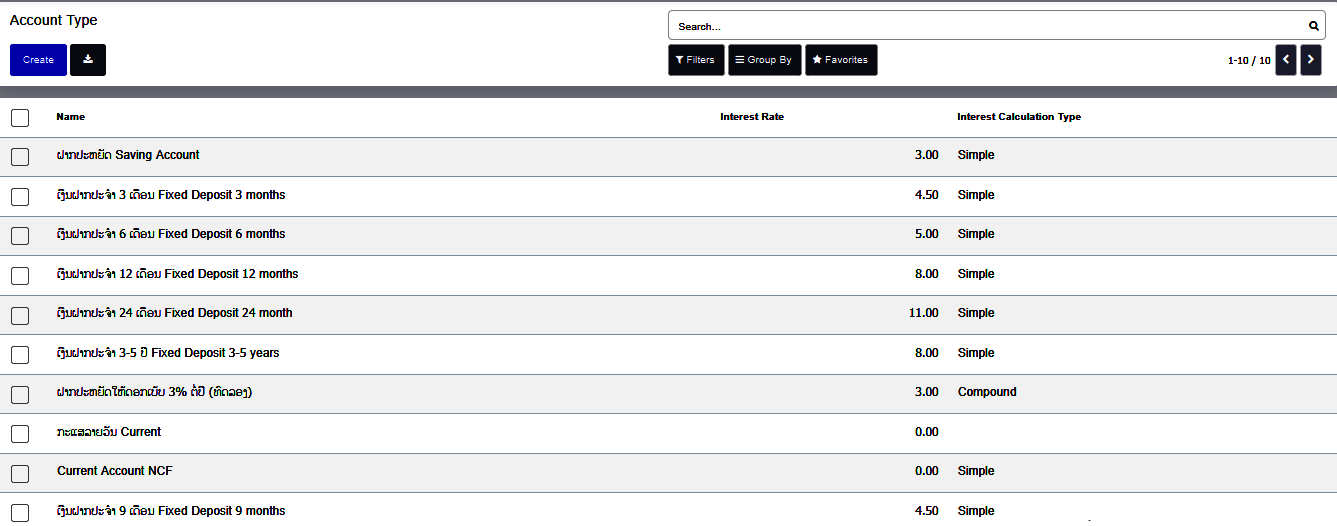
Available Account Types
Savings Account
- A Savings Account is designed for personal or business savings and earns interest over time.
- Managed through the Accounting, Banking, or Custom Modules.
- Supports deposit tracking, withdrawal management, and interest calculation.
Fixed Deposit Account (FD)
- A Fixed Deposit Account allows customers to deposit a fixed amount for a specified term at a fixed interest rate.
- Ideal for long-term savings or investment purposes.
- Can be managed using the Accounting, Banking, or Custom Financial Modules.
Current Account
- A Current Account is best suited for frequent transactions and is commonly used by businesses and individuals with high transaction volumes.
- Offers unlimited deposits and withdrawals.
- Managed through the Accounting, Banking, or Custom Modules.
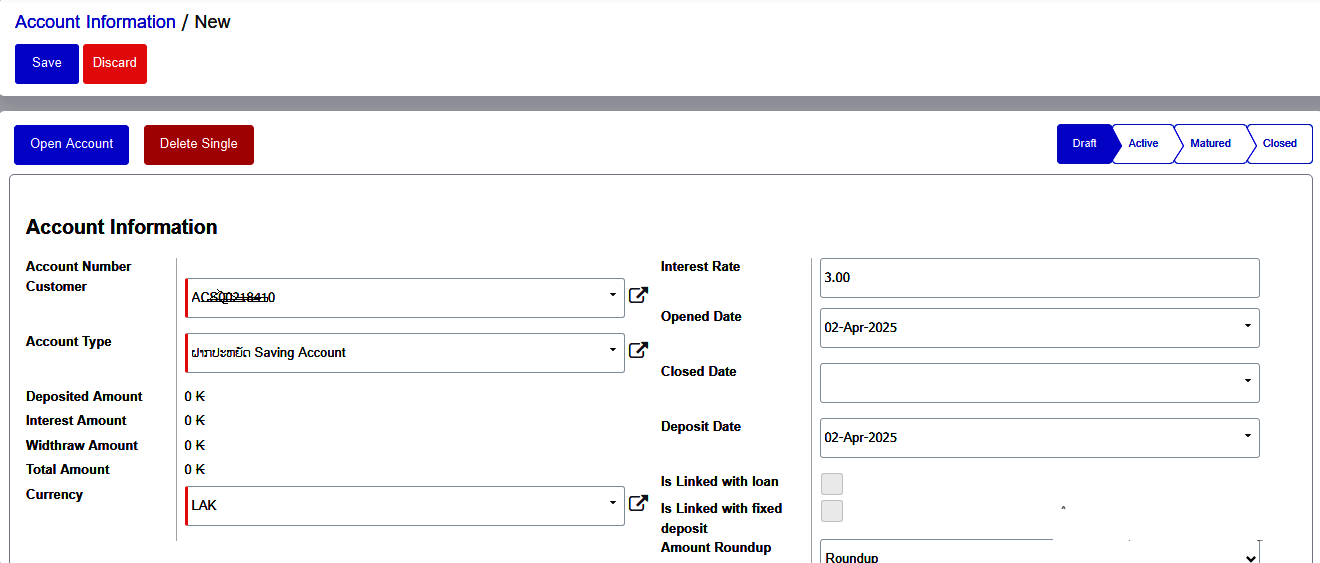
Savings Account Opening
- Customer : Choose Customer from the dropdown menu
- Account Type : Choose your Account type from the dropdown menu To click- ( Savings Account).
- Currency : Select your Currency type from the dropdown menu
- Interest Rate : When the customer selects a savings account, the interest rate is automatically filled by the system based on the generated interest rate.
- Opened Date: Select the date of your account opening application
- Deposit Date: Select the date of your account Deposit application
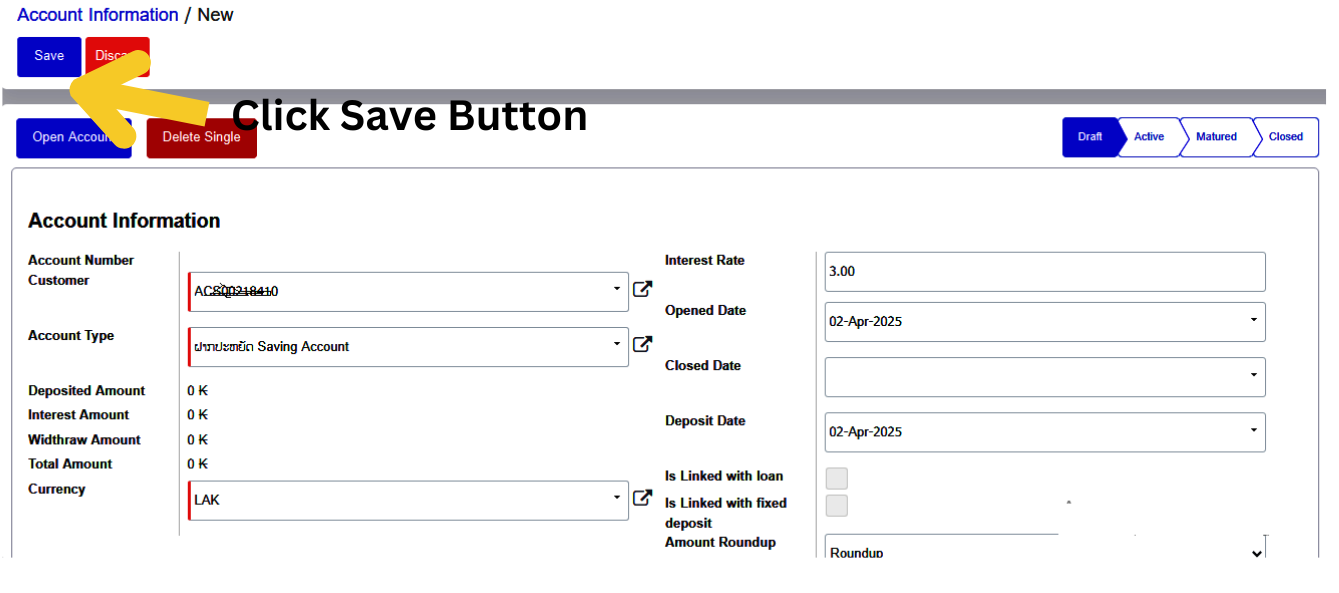
- All details entered by clicking the “save” button.
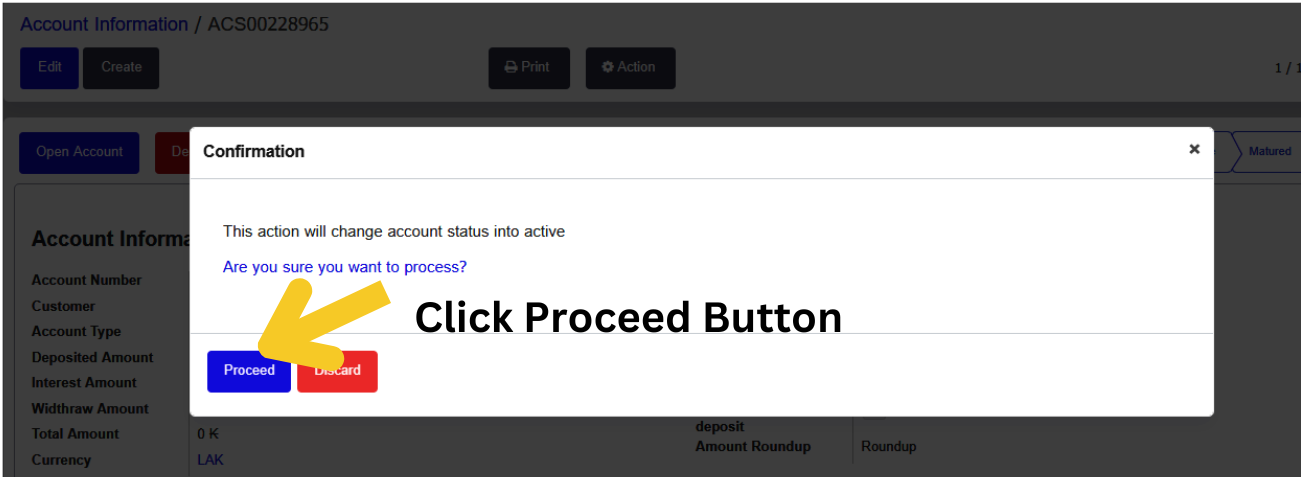
- Activate the Account: After clicking the Save button, the account number is generated automatically, but the account status remains in Draft. To activate your savings account, click the Open Account button. A confirmation box will appear—click the Proceed button to activate your account.

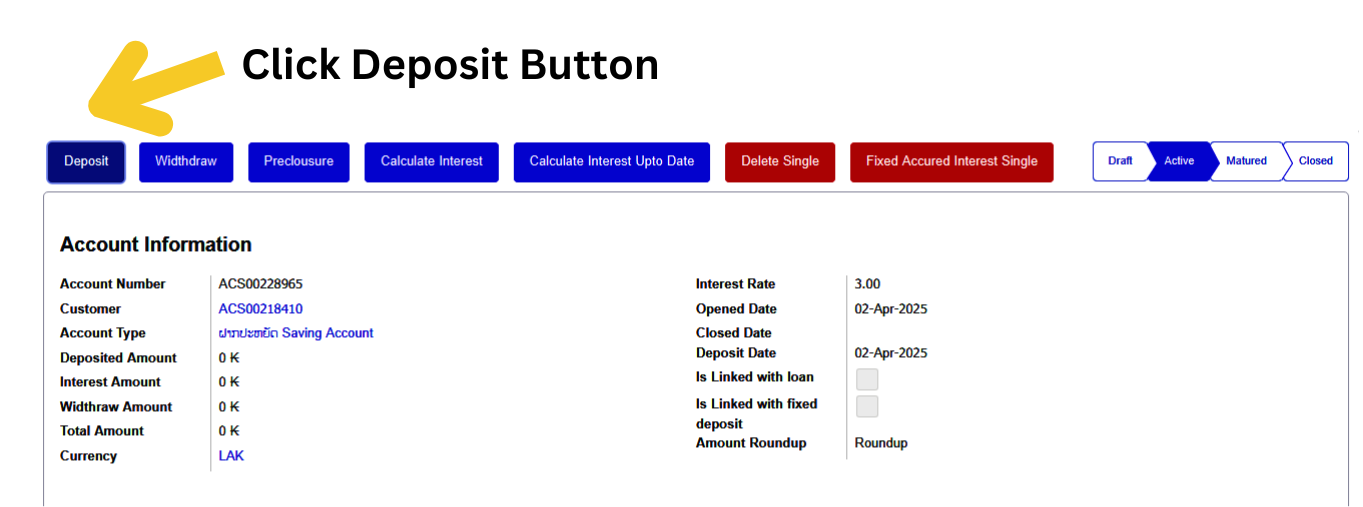
Depositing into a Savings Account
Once the savings account is activated, deposits can be made as follows:
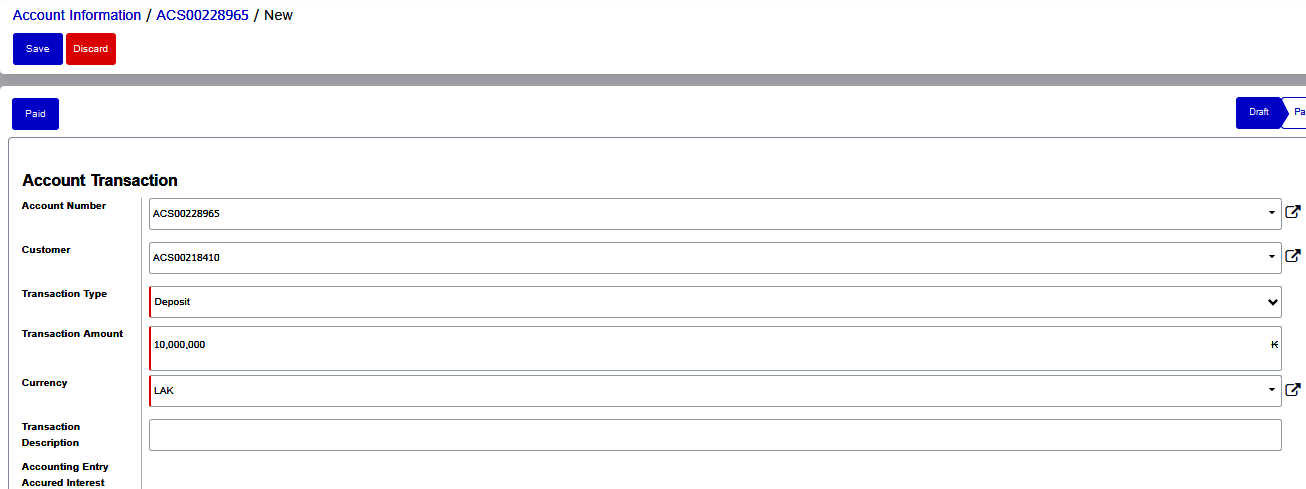
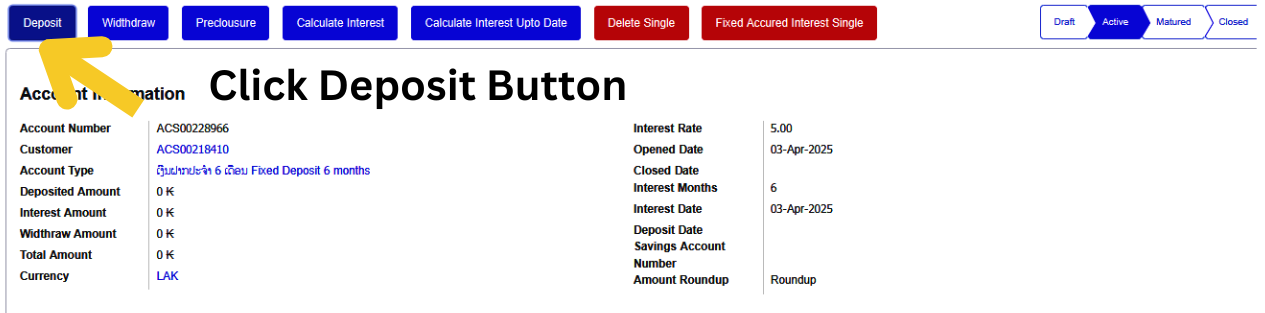
- Initiate Deposit: Click the Deposit button.
- Transaction Type : Choose your Transaction Type from the dropdown menu
- Transaction Amount : Type your Transaction Amount in the box.
- Currency : Select your Currency type from the dropdown menu.
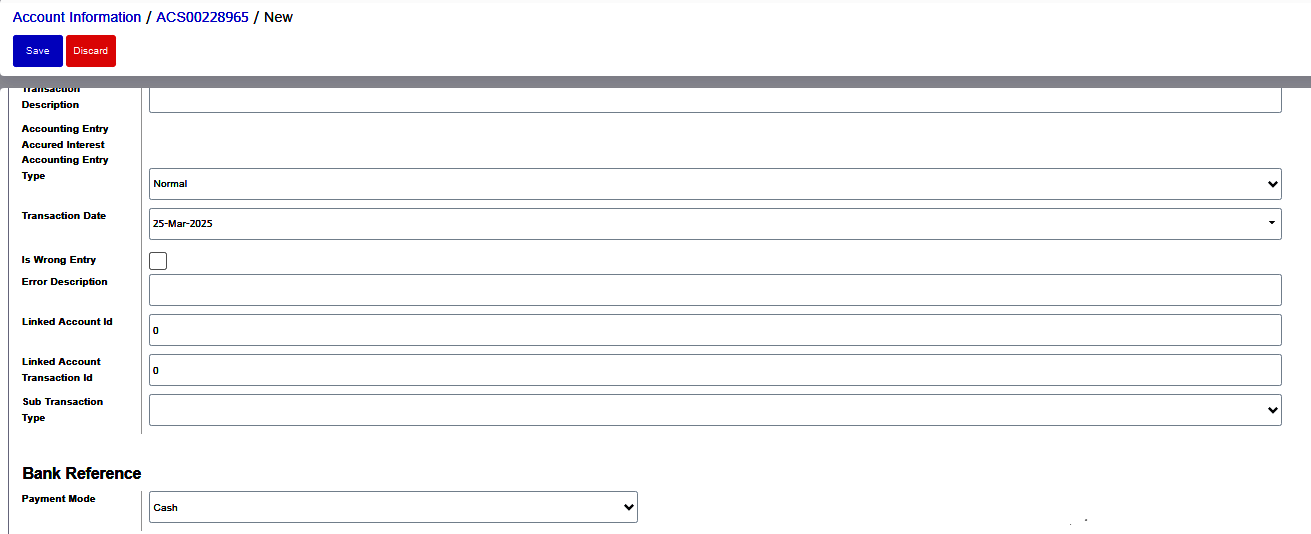
- The transaction description, Sub Transaction Type is not a mandatory field; it is optional.
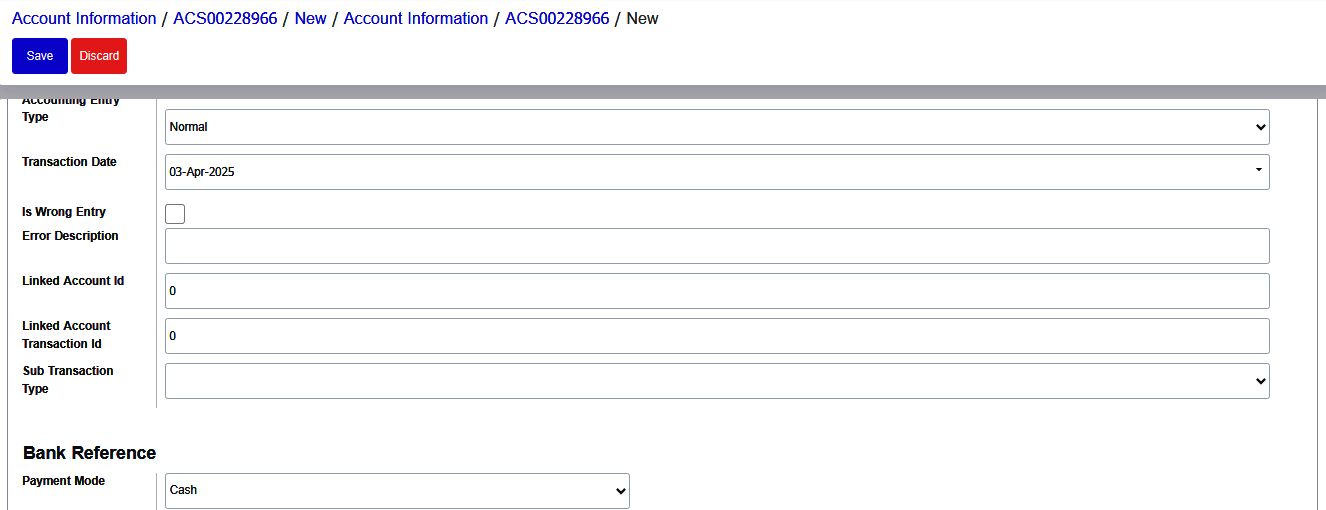
- Accounting Entry Type : Select your Accounting entry type Normal from the dropdown menu
- Payment Mode : Select Payment Mode Cash, Bank or Cheque from the dropdown menu.
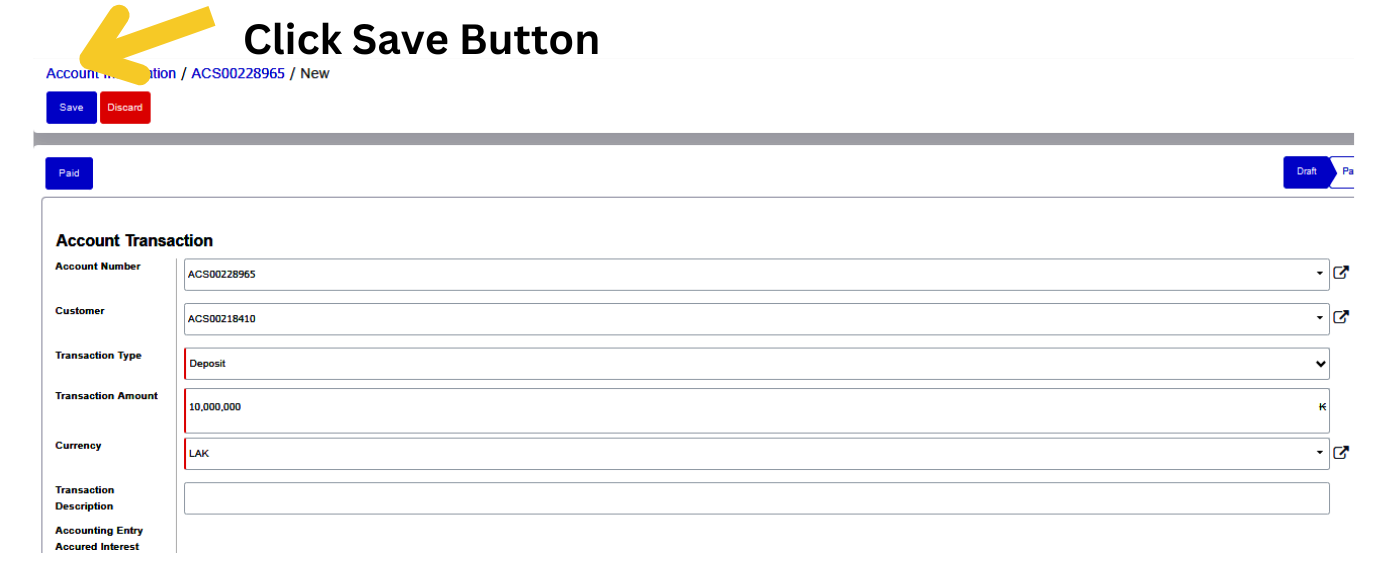
Validate and Save
Click Save to ensure there are no form errors.
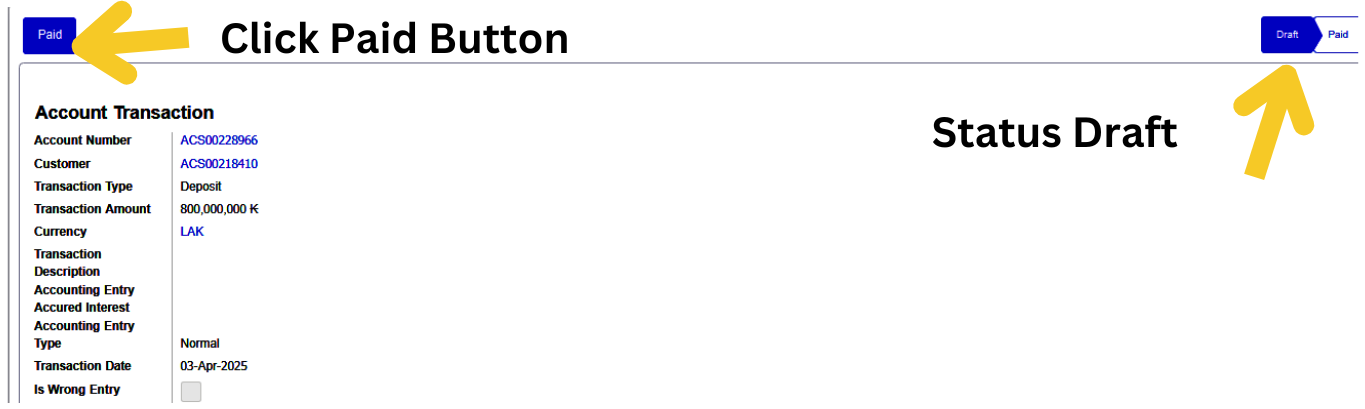
If all details are correct, click Paid to process the transaction.
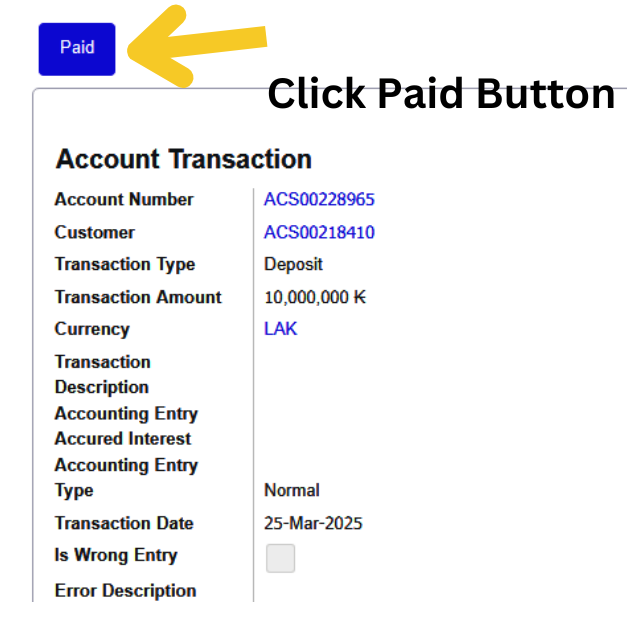
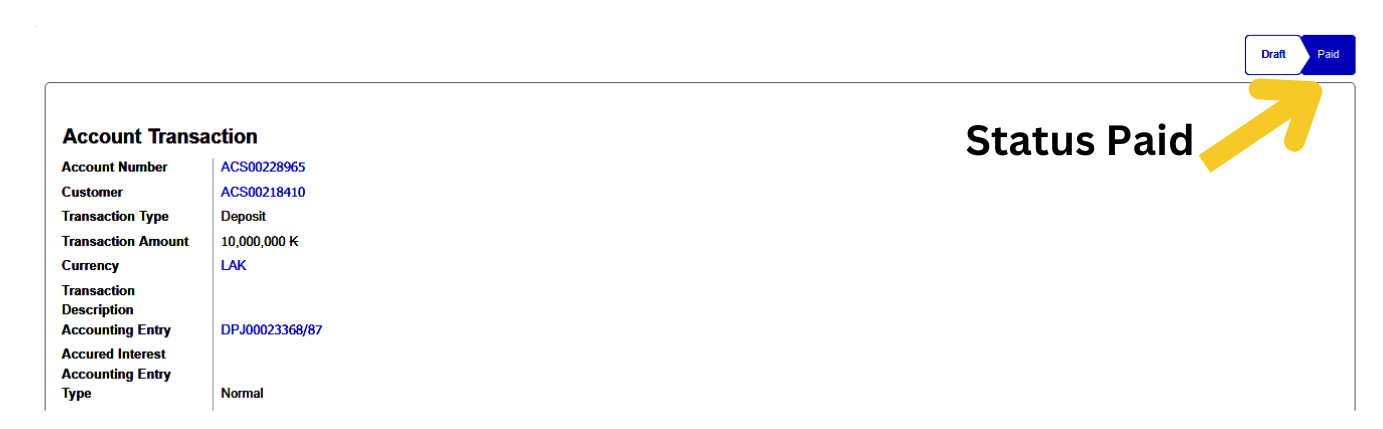
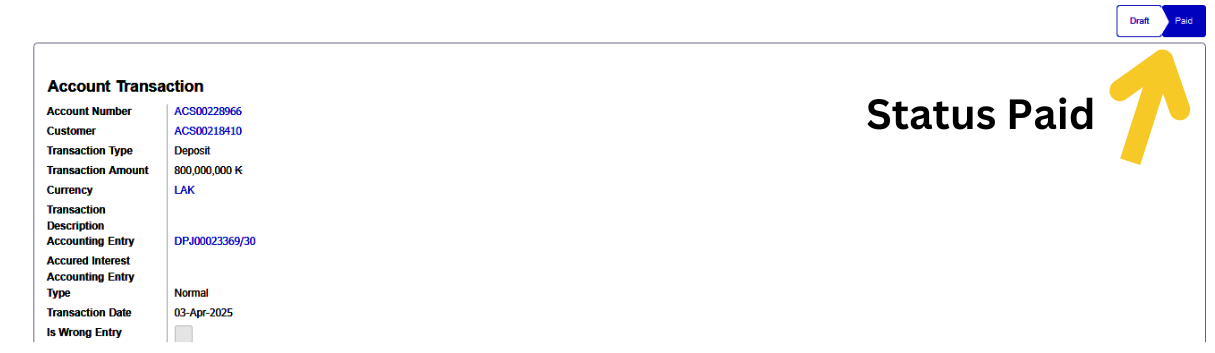
After clicking the Paid button, your amount will be deposited into your account, and the status will be updated to Paid.
Withdrawing from a Savings Account
After successfully depositing funds, the customer is eligible to make withdrawals.
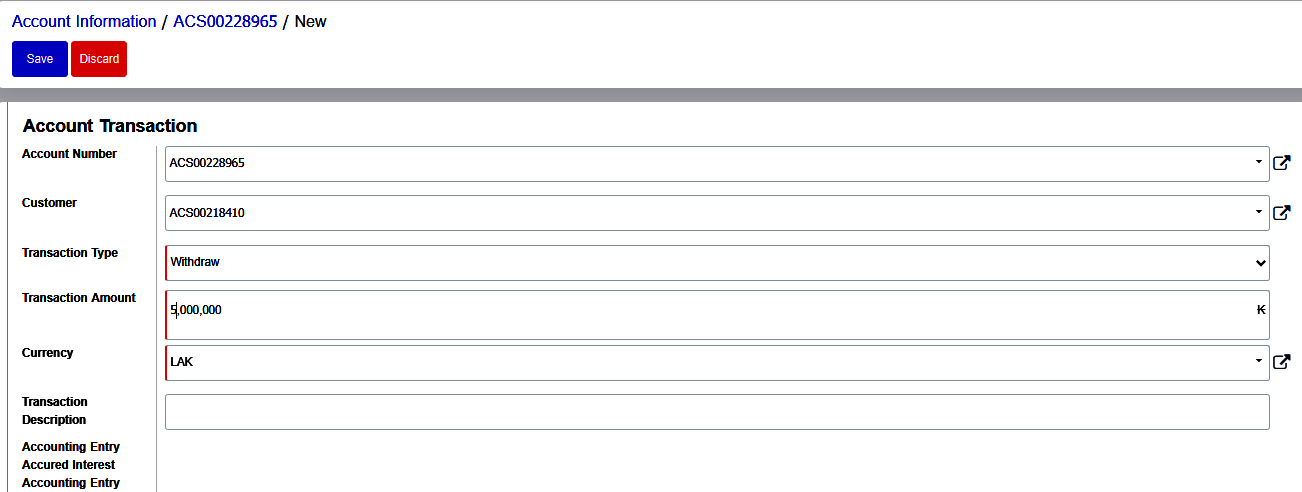
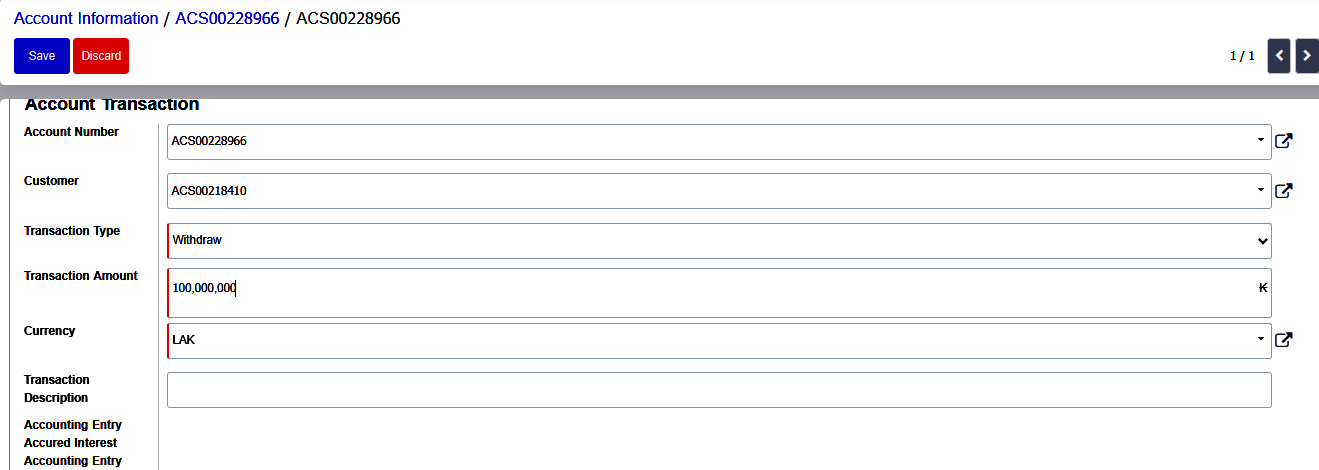
- Initiate Withdrawal: Click the Withdraw button.
- Transaction Type : Choose your Transaction Type from the dropdown menu
- Transaction Amount : Type your Transaction Amount in the box.
- Currency : Select your Currency type from the dropdown menu.
- The transaction description, Sub Transaction Type is not a mandatory field; it is optional.
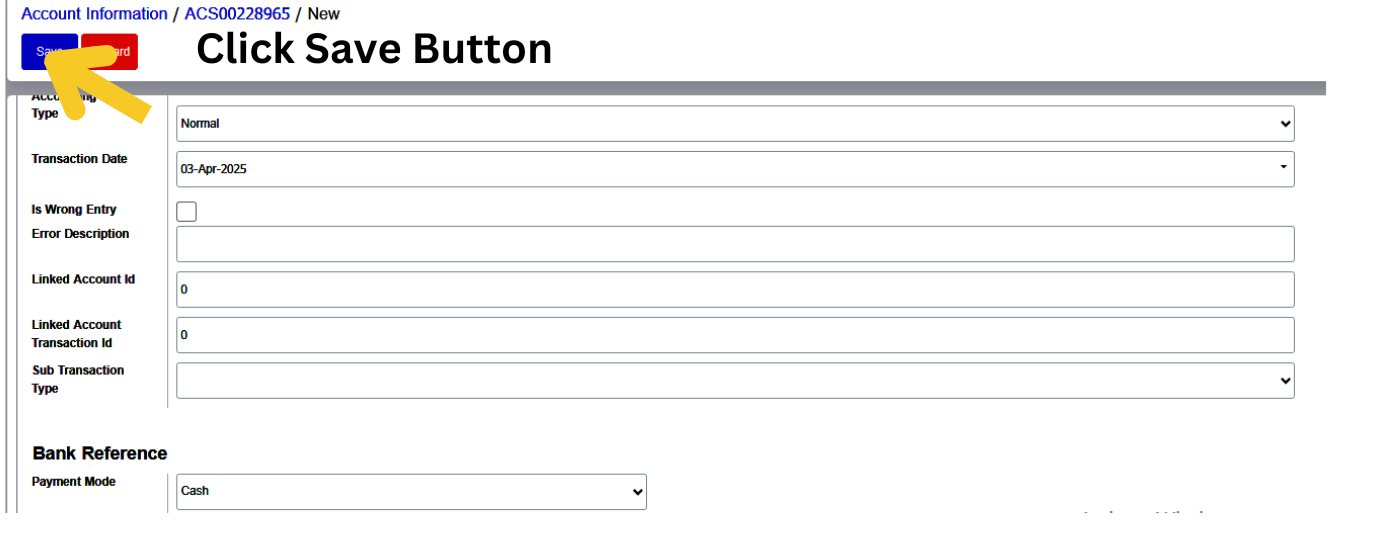
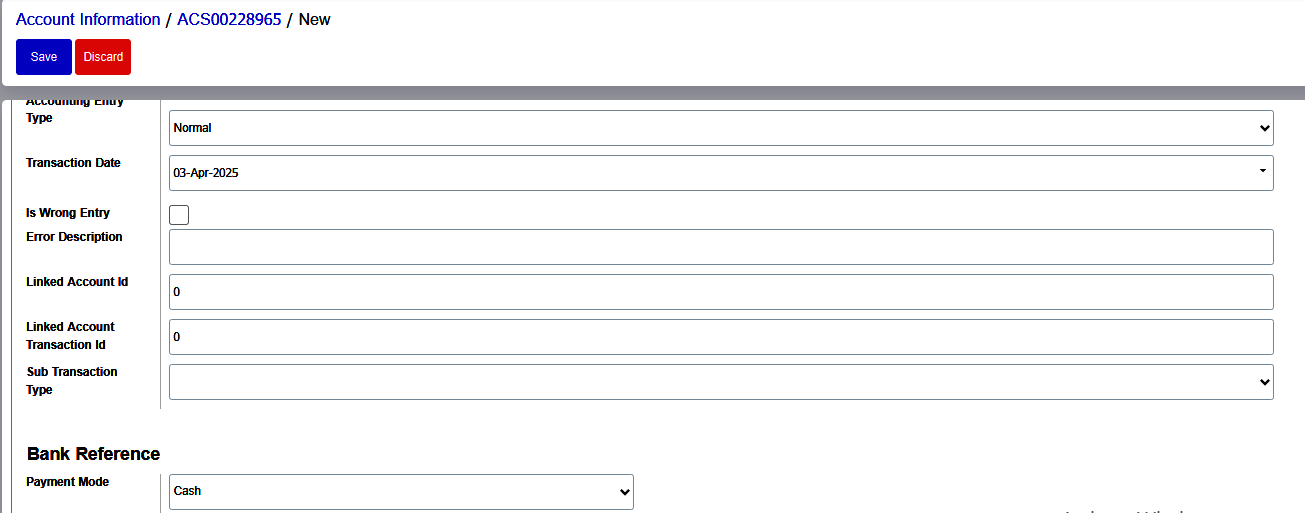
- Accounting Entry Type : Select your Accounting entry type Normal from the dropdown menu
- Payment Mode : Select Payment Mode Cash, Bank or Cheque from the dropdown menu.


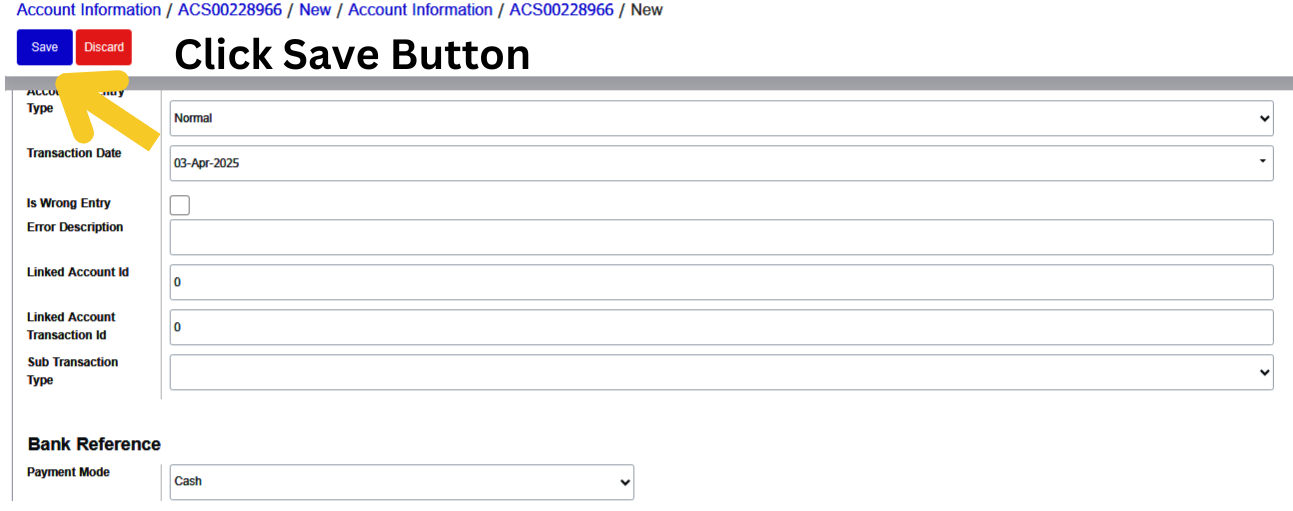
Validate and Save
Click Save to ensure there are no form errors.
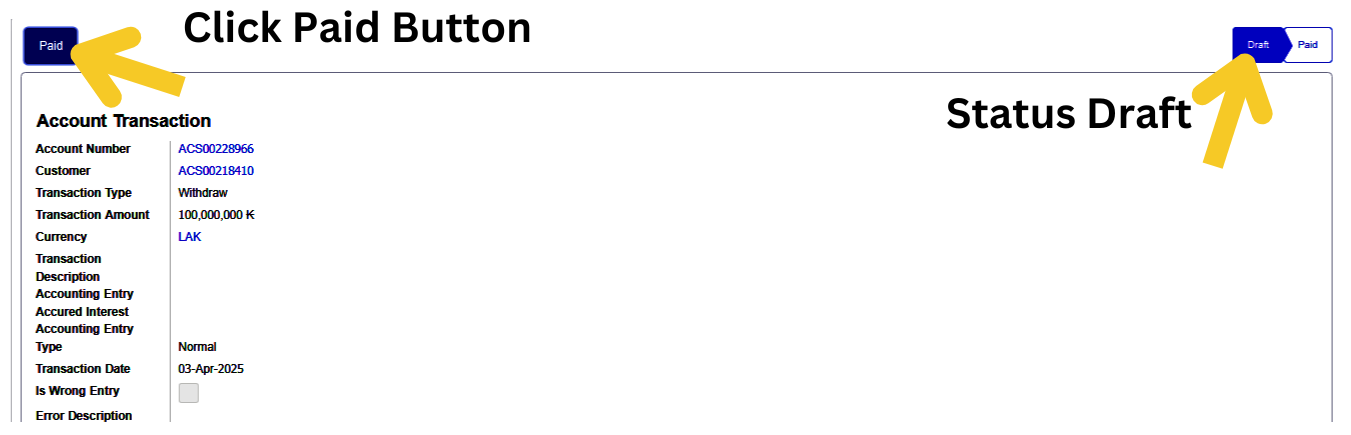
Click Paid to finalize the withdrawal.
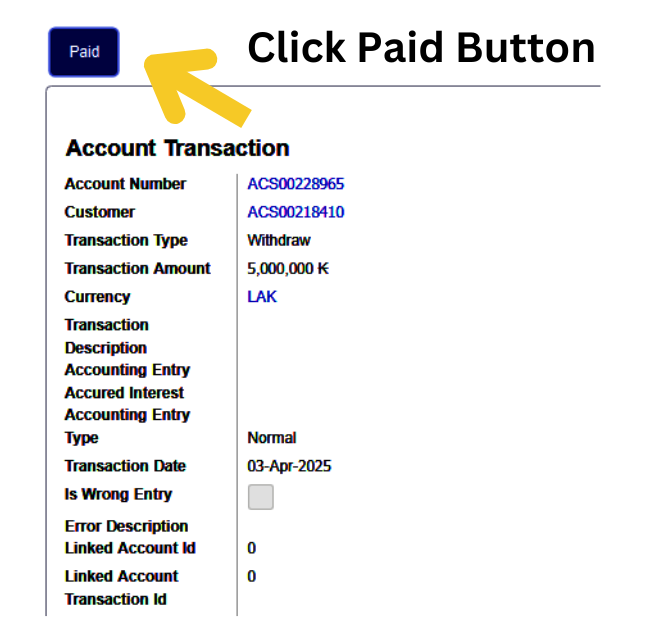

The customer has successfully withdrawn the amount. Check the Transaction menu to view the customer's full transaction history.

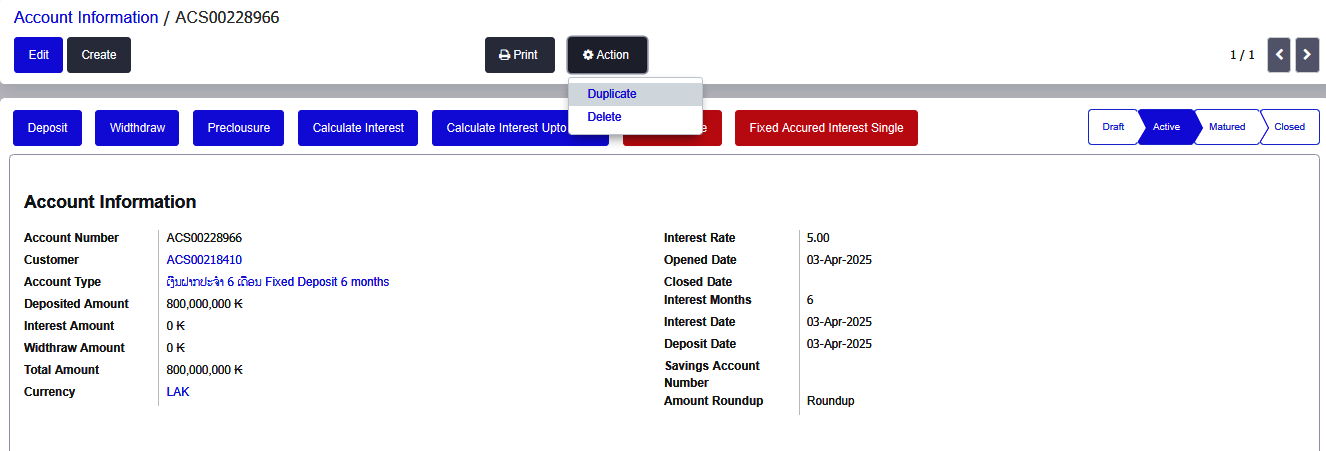
Fixed Deposit (FD) Account Management
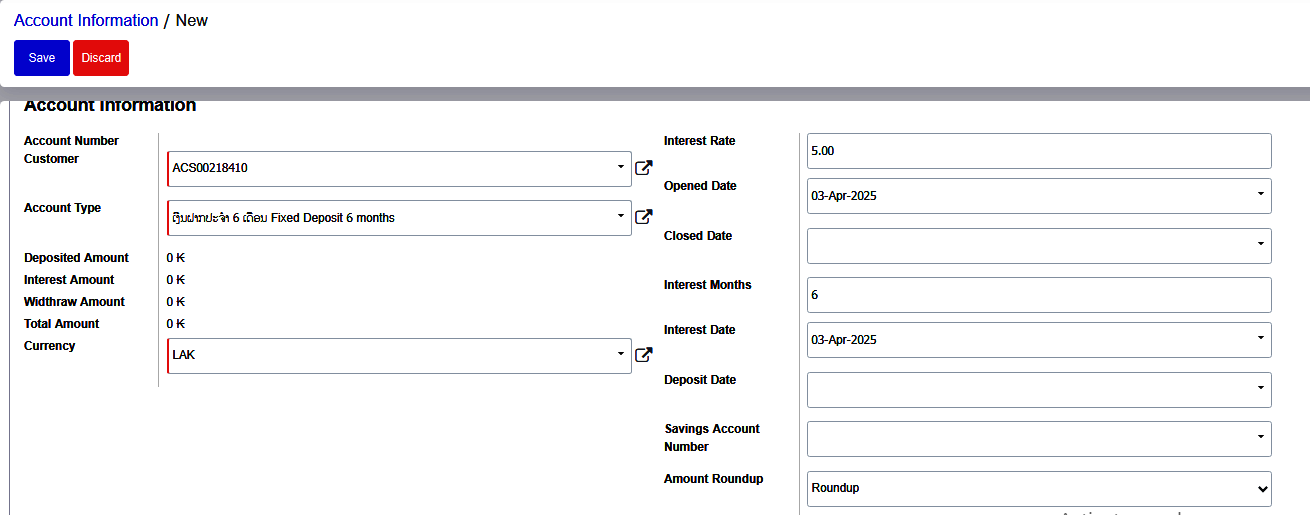
Steps to Open a Fixed Deposit Account
- Customer : Choose Customer from the dropdown menu
- Account Type : Choose your Account type from the dropdown menu To Select any option- ( eg.Fixed Deposit 3 months, Fixed Deposit 6 months, Fixed Deposit 9 months, Fixed Deposit 12 months, Fixed Deposit 24 months, Fixed Deposit 3-5 years)
- Currency : Select your Currency type from the dropdown menu
- Interest Rate : When the customer selects a Fixed Deposit account any duration , the interest rate is automatically filled by the system based on the generated interest rate.
- Opened Date: Select the date of your account opening application
- Deposit Date: Select the date of your account Deposit application
- Interest Months : When the customer selects a Fixed Deposit account any duration , the interest Month is automatically filled by the system based on the generated interest Months.
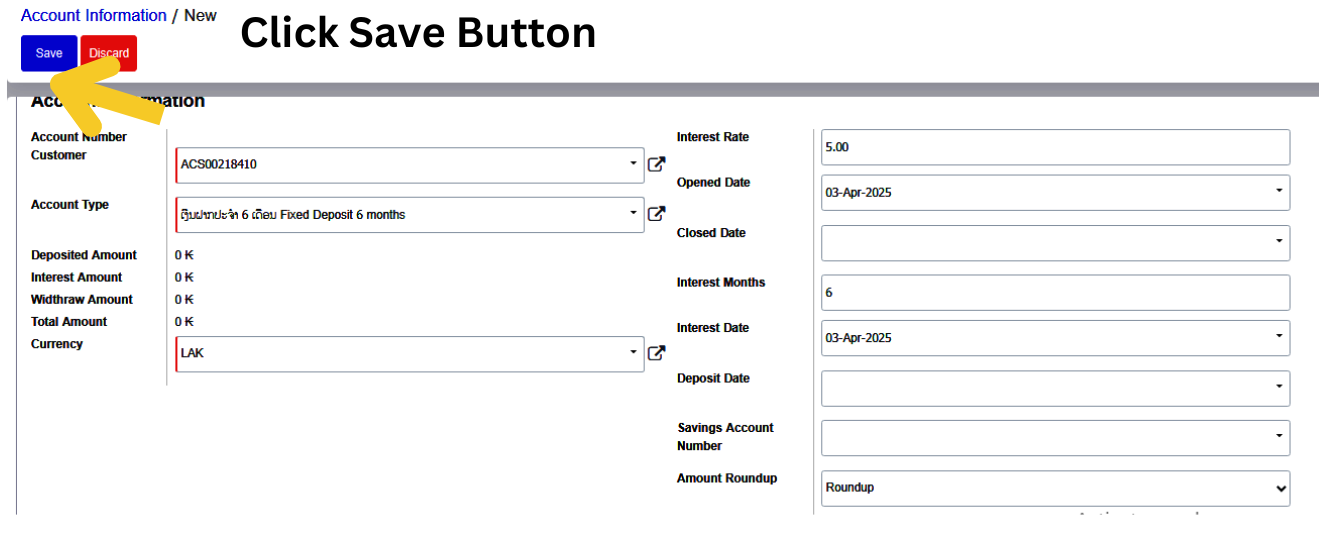
- All details entered by clicking the “save” button.
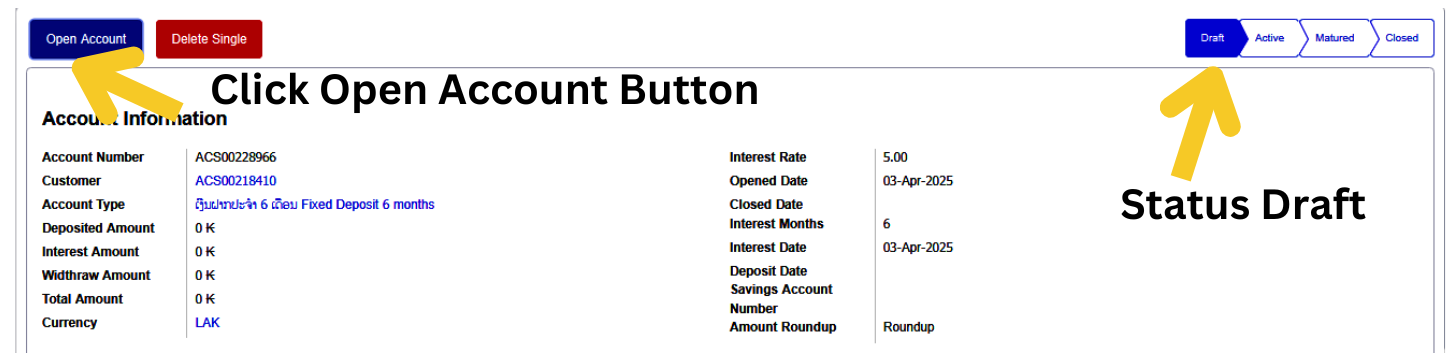
Activate Account
- Click Open Account.
- In the confirmation dialog, click Proceed to finalize and activate the FD account.
- An account number will be automatically generated.

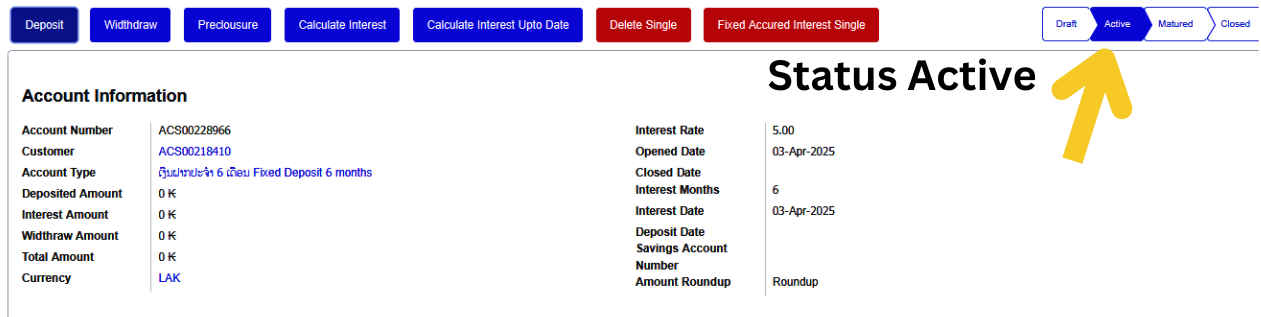
FD Account Deposit Process
Once the Fixed Deposit account is activated, the customer can deposit funds.
Steps to Deposit Funds
- 1.Click Deposit.
- 2.Enter the Deposit Amount and relevant details.
- 3.Click Save to validate the form and check for errors.
- 4.Once validated, click Paid to confirm and process the deposit.
- 5.The deposit amount will be credited, and the account status will be updated to Paid.


After clicking the Paid button, your amount will be deposited into your account, and the status will be updated to Paid.
FD Account Withdrawal Process (Interest Only)
A customer who has opened a fixed deposit account is allowed to withdraw only the interest amount. Withdrawal of the deposit amount is not permitted. (for the duration months)
Conditions for Withdrawal
- Interest can be withdrawn only after a full month has passed since the deposit.
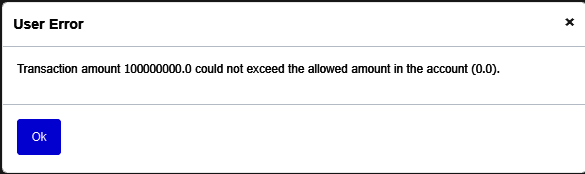
- Attempting to withdraw interest prematurely will trigger an error message.
Steps to Withdraw Interest
- Click Withdraw.
Enter the required details
- Transaction Type : Choose your Transaction Type from the dropdown menu
- Transaction Amount : Type your Transaction Amount in the box.
- Currency : Select your Currency type from the dropdown menu.
- The transaction description, Sub Transaction Type is not a mandatory field; it is optional.
- Accounting Entry Type : Select your Accounting entry type Normal from the dropdown menu
- Payment Mode : Select Payment Mode Cash, Bank or Cheque from the dropdown menu.

Enter all withdrawal details and first click the “Save” button. This helps identify any Mistakes in the form. If there are no Mistakes, click the “Paid” button to deposit the amount into the customer's account.
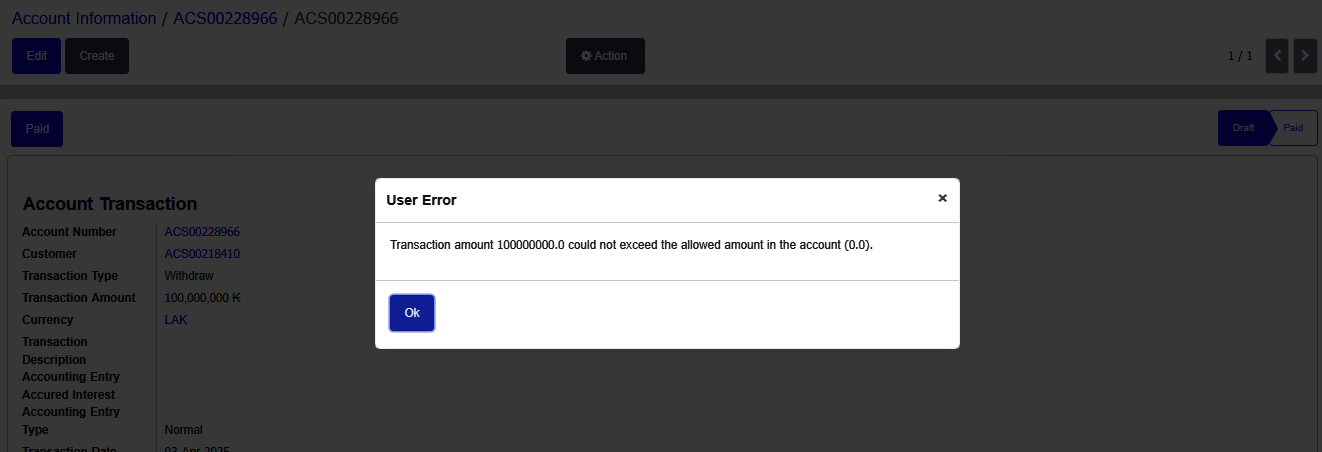
- If a customer opens a fixed deposit account for, example, six months, they are allowed to withdraw only the interest amount. However, if the account was opened one month ago, the customer can withdraw the interest earned next month, not the current month.
- If the customer attempts to withdraw this month, an error message will appear.
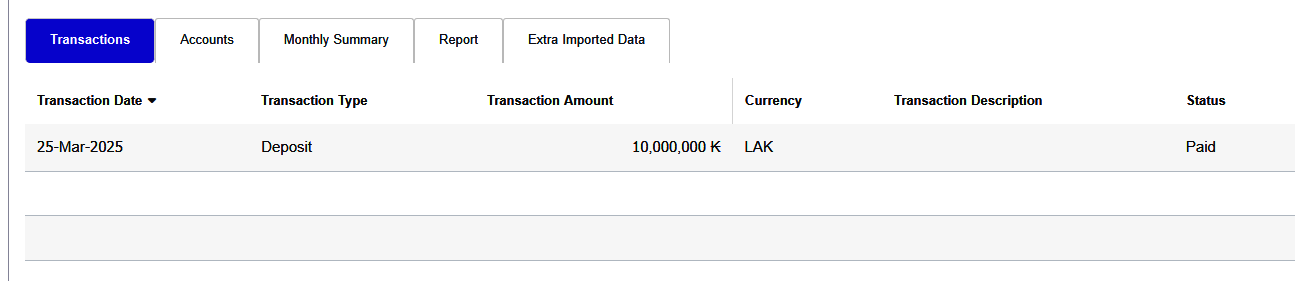
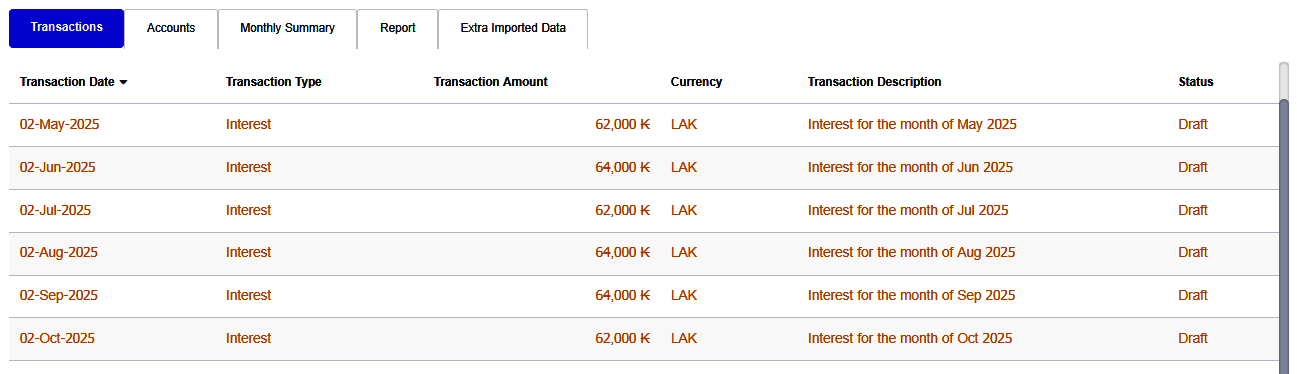
Transaction Menu
The Transaction menu provides access to the customer’s complete transaction history, allowing users to review all financial activities associated with the account.
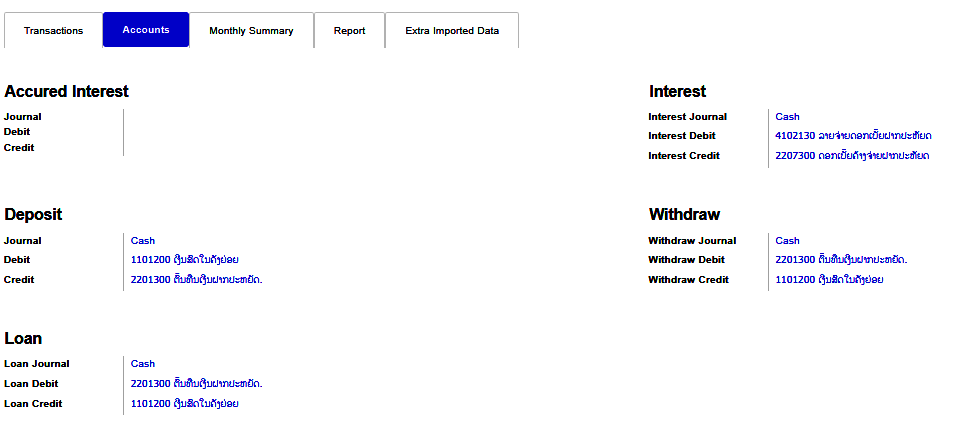
Accounts Menu
The Accounts menu displays detailed information about the customer’s account history, including current and past account statuses.
Monthly Summary Menu
The Monthly Summary menu presents a consolidated view of the customer’s monthly financial activity, offering insights into trends and account performance over time.
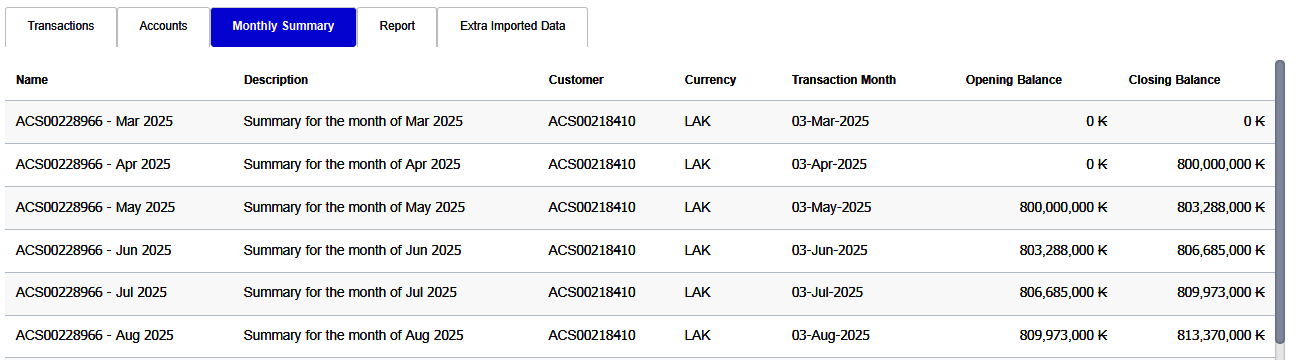
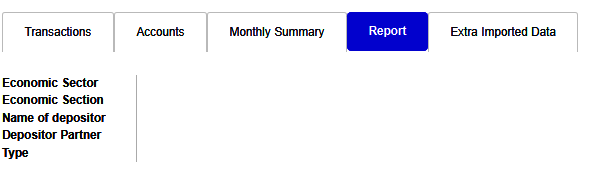
Report Menu
The Report menu allows users to access and review historical reports related to the customer’s account, including performance metrics and financial summaries.
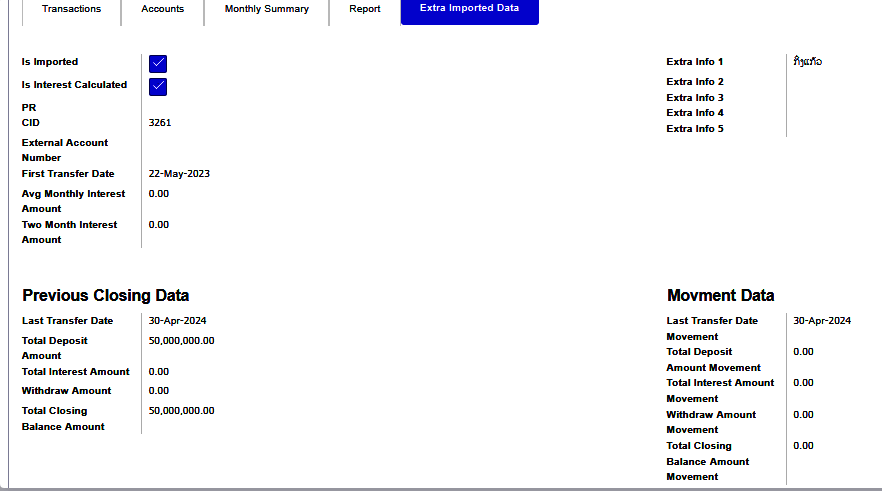
Extra Imported Data Menu
The Extra Imported Data menu enhances business operations by allowing the import of supplementary information from external sources. This functionality supports:
- Data Importing: Add additional customer data, invoices, product information, or financial records from external systems.
- Bulk Data Entry: Efficiently input large volumes of data such as employee details, inventory, or sales orders.
- Data Integration: Synchronize data with third-party applications, spreadsheets, or databases to ensure consistency across platforms.
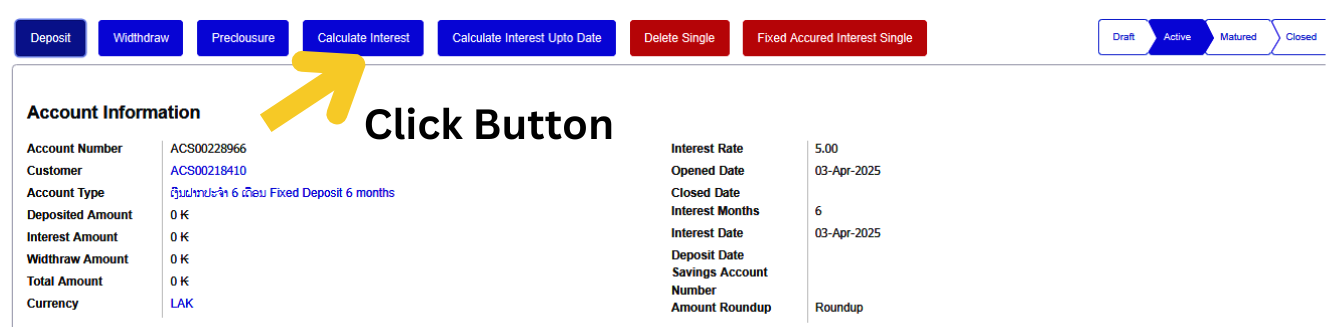
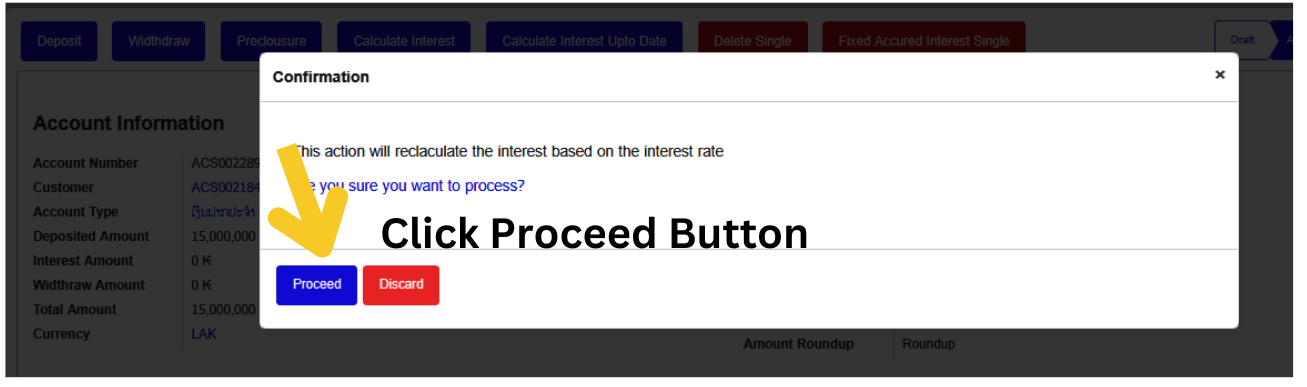
Calculate Interest Button
The Calculate Interest button is used to compute monthly interest for the customer's account. To confirm and initiate the calculation, click the Proceed button in the confirmation dialog.
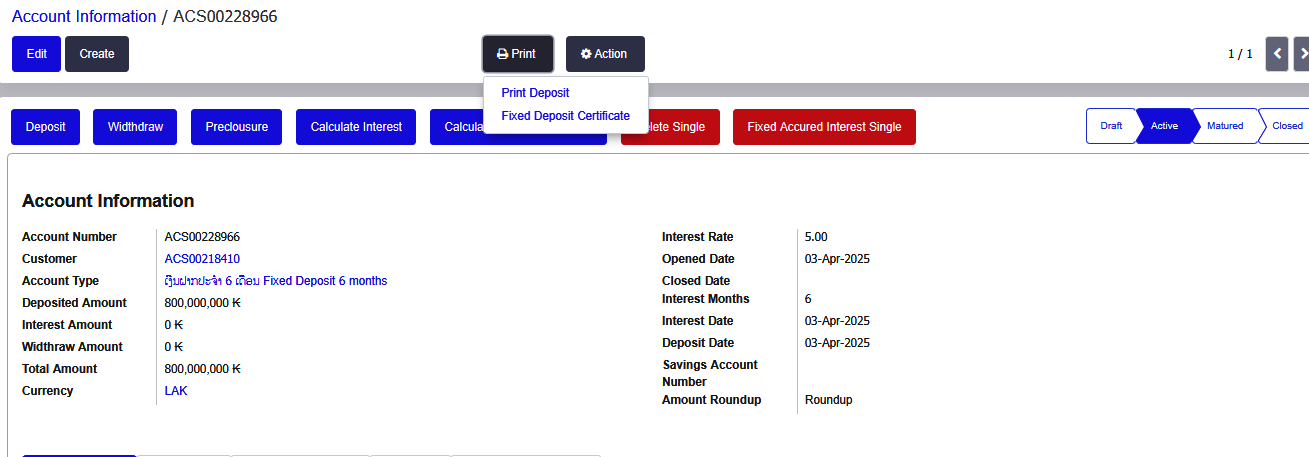
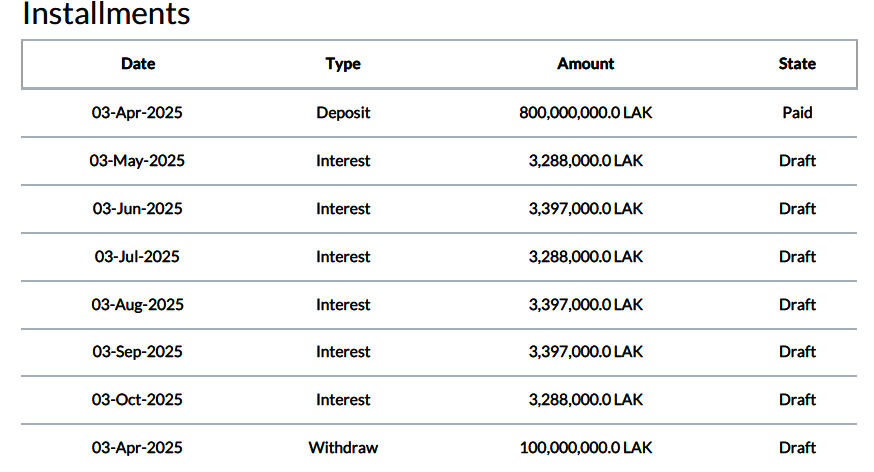
Print Button
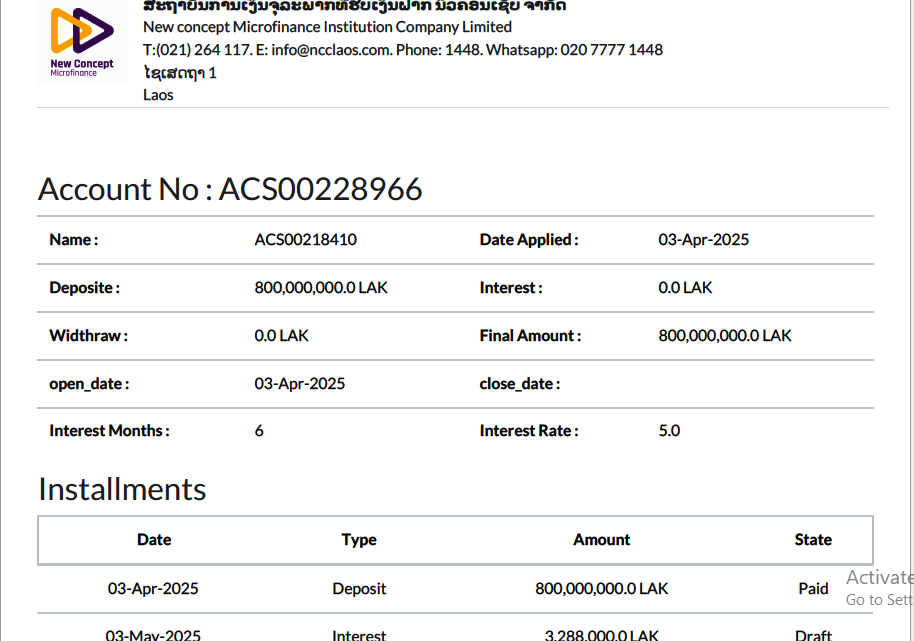
- Print Deposit: Generates a PDF report containing detailed account and installment information.
- Fixed Deposit Certificate: Creates a PDF certificate that includes the customer’s fixed deposit account and installment details.
Action Button
- Duplicate: Copies the account details of one customer to another profile, simplifying account setup for similar entries.
- Delete: Permanently removes the selected customer’s account information from the system.
Account Menu- Page View Features
List View
The List View displays records in a structured, tabular format. It is ideal for managing and reviewing large volumes of data efficiently.Key features include
- A clear and organized table layout
- Ability to view multiple entries at once
- Sorting, filtering, and searching capabilities
- Quick actions such as edit, delete, or duplicate directly from the list

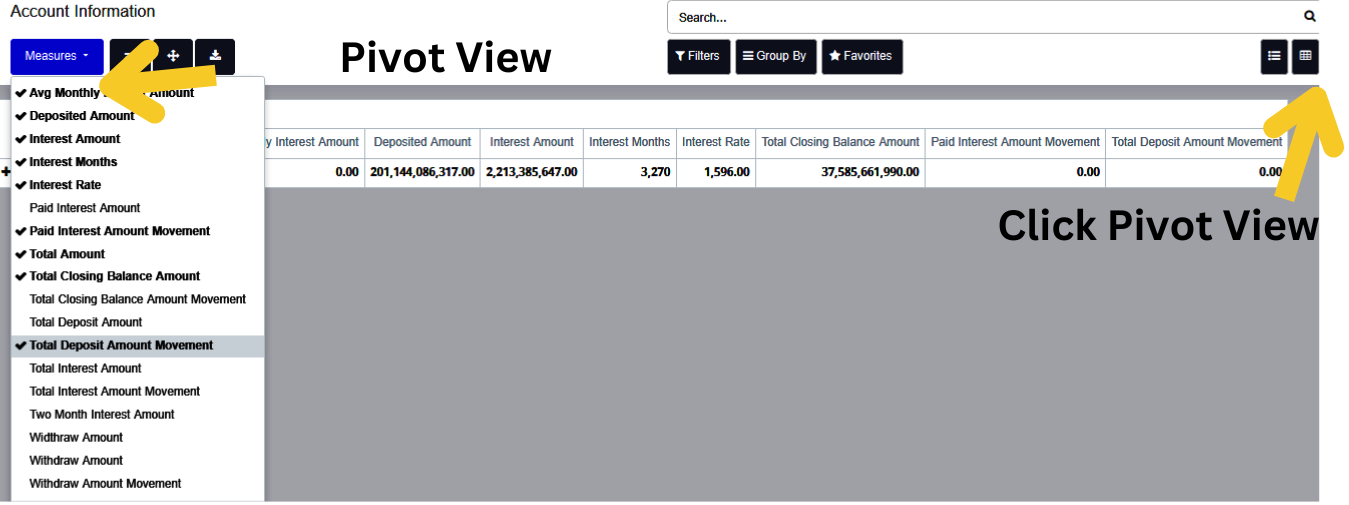
Pivot View
The Pivot View is designed for advanced data analysis and reporting. It enables users to dynamically summarize and group data from various modules, offering deep insights into operational performance.Key features include
- Interactive drag-and-drop interface
- Data grouping by rows and columns
- Aggregation functions (e.g., sum, count, average)
- Useful for analyzing data across modules like Sales, Purchases, and Inventory